Quantcast
Channel: MessyJesse - a quilt blog by Jessie Fincham
Viewing all 205 articles
Browse latest View live

Farmer's Wife Quilt: Week 122

$
0
0
Yes you read that right, I'm into my 122'nd week of being a Farmer's Wife! I actually bothered to count back from when I started. Yikes. If that's not a motivator to get my butt in gear I'm not sure what is!? This week are blocks; #40 Friendship Block / #42 Fruit Basket.


Since I'm now making the blocks in number order (as apposed to picking and choosing random one's previously) it's making it a lot easier to know where I am, next week I'll have a count up and see how many I've done! I love these two above, I used my first ever civil war print in the fruit basket block, it's so pretty! Notice the flowers all facing the same direction ;-) that was no accident… Hope you're all having a fun weekend. xo

Scrappy English Paper Pieced Stars + Upcoming EPP Summer Series

$
0
0
Carrying on with Americana theme from last week, I thought these scrappy red stars looked quite patriotic sitting on my dining table, don't you think? I've been working on these for a couple of evenings as a change from my other hand sewing WIP's. I happened to come across this Seven Sister's quilt top by Martha, over at Q Is For Quilter blog recently that I instantly fell in love with so I set about copying her exactly! ;-) I'm a big fan of Martha's work; like myself, she has a real passion for antique quilt patterns and fabrics. She makes the most beautiful quilts using traditional templates and true authentic vintage and antique prints, which I adore. Can't go wrong in my book.

I've used the Sewline glue pen method for the last couple of EPP projects I've done, and my gosh it's quick! After cutting the fabrics to use with the 1-1/4" diamond shapes they were all basted in no time at all.This is going to be a table centre or wall hanging using the layout below, adding in some white diamonds to join the stars together. It's so enjoyable to be doing a smaller EPP project, I seem to love taking on giant projects which take forever and a day to complete! 

In other EPP news, I'm in the midst of planning a run of blog posts for a 'Summer Series on English Paper Piecing'. The summer is a great time to play with EPP so I thought I would give a low down covering errything! From a little history, the basics; hexagons, diamonds, finishing EPP projects, patterns and more. Starting possibly 21st July if all goes to plan. Please drop me a comment below if there is anything specific you'd like me to cover and I will add it in ;-)

50 States Stitching Project: Week 2

$
0
0
Hello! I've just finished this one in the nick of time for this week's installment of 50 States Stitching quilt project. This week is Pennsylvania, so we've been given a fun Liberty Bell motif to stitch up. The great thing about this project (aside from making this great quilt) is learning something new each week, I find myself googling the design to find out more. I didn't realise the bell was cast at the Whitechapel Foundry in East London, but the clapper ball cracked the bell on it's first use!? eek! I wonder if the bell maker back in London got a telling off!? 


I've always wanted to visit Philadelphia ever since I worked for Anthropologie in London a few years back - the headquarters were based in Philly so some of my friends in the office would visit quite often. Of course, it always sounded amazing - very cool with tons of quirky antique shops, flea markets, nice places to eat and historic architecture. Some day ... but for now this motif will have to suffice! xo

Farmer's Wife Quilt: Week 123

$
0
0
Just in time for this week's Farmer's Wife Quilt blocks! I'm trying to keep up with my target for two blocks a week ;-) Today's blocks are #43 Garden Path and #44 Gentleman's Fancy. 
This is my first go at a Y-seam in all my year's of quilting! I've avoided it like the plague as it's always scared me! It wouldn't have been too bad had I not needed to un-pick the whole thing after realising I had pieced it together wrong; seem's to be a familiar story with this quilt… #44 came together easily, I've already done one of these blocks but I wanted to re-do it because I've gone off it. That's the problem when you're doing a quilt over such a long time period I guess. Hope fully there won't be too much repeating needed! Have a relaxing Sunday friends. xo

English Paper Piecing Basics: Week 1 // A Little History, Supplies + A Giveaway!

$
0
0
Hello, and welcome to our first week on the basics of English Paper Piecing! I'm hoping to cover a range of topics to help you with your English paper pieced projects. There will be step-by-step tutorials, inspirational ideas, free patterns and more, I'll be posting each Monday for the next 10 weeks or so - I have to get organised and sort out the finale schedule ;-) so I do hope you'll join along with me. English paper piecing (EPP) has become oh so popular again in recent years, which I for one am really happy about! It seems so often in quilting and life in general nowadays, to speed everything up. Don't get me wrong there are lots of times when I want to do just that, and if there are new tools or methods to make the lives of us quilters easier, then I'm all for it! Also I know not everyone has the luxury of endless sewing hours but I love the contrast of hand sewing and watching a quilt project grow and develop over time; enjoying the slower pace and process. 


So, What Is English Paper Piecing?

Well, in short - it's an age old technique that is used to make quilts by hand. Fabric is basted over a pre-cut paper template and then the templates are sewn together to form a quilt. Sounds simple, yeh?

When you think of English Paper Piecing; sometimes known as 'mosaic patchwork', hexagon quilts usually spring to mind, largely because It's the most popular and  predominantly used shape throughout the history of the craft. The hexagon pattern originated in England during the 1700's and became a popular design in both Europe and the U.S. during the last quarter of the 18th century - when all thing's English became highly fashionable. Apparently this is how the name 'English' Paper Piecing was coined, it was a marketing stunt! The most recognisable of all EPP patterns; the Grandmother's Flower Garden rose to popularity in the 1920s and 1930's most likely because it can be made easily with scraps, which was so important during the Depression of that time. You can often still find antique EPP quilts with the paper templates intact, which were recycled from books and documents. 


What Materials Do I Need?

So the first couple of posts in our summer series is about getting started, for which you need materials! The great thing about EPP is that you really don't need much to get going. Above are my personal favourite's and tools I use for EPP but by no means is this a definitive list - swap and change to adapt to your preferences and sewing kit you have on hand.


First up you'll need some fabric to chop into! There is a vast supply of 100% cotton quilting fabrics available to us now, so take your pick! When choosing your selection keep in mind the importance of value; you'll need a mix or light and dark fabrics to really make your quilt projects stand out. If you want to try fussy-cutting, look for fabrics with a good repeating pattern (if you have no idea what I'm talking about - don't worry fussy-cutting will be covered later in the series!). You may also want to pre-wash your fabric before starting to test for colour-fastness and allow for shrinkage. 

My personal choice of needle is a Gold Eye Sharps. Size 11. though remember that the thicker the thread the thicker the needle required, so keep that in mind depending on your thread choice. 

I use Aurifil 50wt thread for hand sewing, it's a lovely fine strand so it glides through the fabrics well. However I have heard from the lovely Florence; an avid EPP'er, that she has recently tried Superior's Bottom Line, a strong polyester thread which apparently rarely tangles - so I'm hoping to test that out soon! 

Small scissors are vital for snipping threads as you work through a project. You'll also need some paper scissor's if you choose to make your own paper shapes. 

I like to use my rotary cutter to cut fabric shapes ready for basting, I find the smaller 25mm size is ideal. Though you can use fabric scissors for cutting if you prefer. And a cutting mat of course!

You may also want to try out the Sewline glue pen, which has set the quilting world abuzz since it's release. You can use this instead of hand-sewing the shapes (we'll talk more about that next week), so it really speeds up the process and allows you to crack on with the fun sewing - sewing the shapes together of course! 

And last but by no means least, pre-cut paper piecing templates. We sell a large range of these at Sew and Quilt, and they are certainly my preferred method. I have made my own shapes in the past which was fine, but I soon realised it took up so.much.time. and not fun crafting time - cutting time! Being a leftie, it really wasn't an enjoyable part. I also know when I'm using the pre-cut paper pieces they are die-cut so accuracy is spot on, which is critical for EPP.

How Do They Measure?

Pre-cut paper pieces are sold in various sizes to suit your design needs. Geometric shapes are measured by measuring one of the equal sides. This hexagon below is the 1" size.  


With the curved paper pieces we measure these slightly differently, they are measured across the diameter. The apple core shape below is the 4" size, and the clamshell is the 3" size. 


Almost any shape can be used for EPP, a wide variety of shapes in various sizes will fit together just like a jigsaw so the opportunities for creating individual pieces of patchwork is unlimited! You can finish a quilt made entirely of interlocking shapes or combine completed blocks with needle-turn appliqué to create endless possibilities for design. We'll go through step-by-step ways on finishing EPP quilts later in the series. 

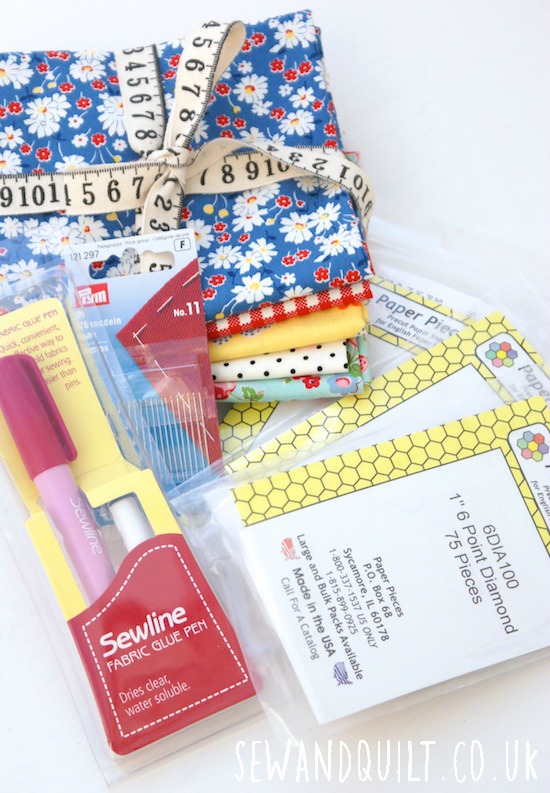
So I figured what better way can I kick off the new EPP summer series than to offer a giveaway for some English Paper Piecing goodies! This is a fantastic starter pack of supplies from my shop Sew and Quilt. One lucky winner will receive a selection of five fat quarters, three packs of Paper Pieces and some needles to get sewing straight away! Oh and a Sewline glue pen!

****************

How To Enter

For your chance of winning leave me a comment on this post telling me one (or more) things you would like me to cover during the series / or what EPP project you are working on.

For additional entries please share this on any of your favourite social media sites; Facebook / Twitter with an additional comment for every share. 

You can also find me on Instagram @messyjesse1 where I will be offering an additional entry.

Winner will be announced on the blog next Monday 28th July 2014. Competition closes Midnight Sunday 20th July. International entries welcome. Next week is all about the humble Hexagon and getting started! Hope you can join me! Have a great week. 

English Paper Piecing Basics: Week 2 // Hexagons - Grandmother's Flower Garden, Rotary Cutting and Basting + Giveaway Winner!

$
0
0
Welcome to week two on our English Paper Piecing Basics Summer Series! This week is all about the humble hexagon! And in particular the much coveted Grandmothers Flower Garden quilt. In this special two-part post (because there's a lot of info!) I will guide you through the two methods to baste your hexagons. Hand sewing and the Sewline glue pen method. Part two is all about joining your shapes together and achieving a neat finish. 

As I mentioned last week in our brief history of English Paper Piecing (EPP), the Grandmother's Flower Garden or Hexagon Flower Garden as it's sometimes known was hugely popular in the 1920's and 1930's, and it's not hard to understand why! They are truly beautiful! They can be dated back to the 1700's in England (known then as mosaic's or honeycomb patterns) and from what I've read on the subject the revival that came about in the 20s and 30s were much to do with the general Colonial revival in quilting at that time. There seemed to be a national wave of nostalgia in the U.S. at that time so the nations 'colonial' past was suddenly all the rage - and quilting  heirlooms were in! So modern women of that time set about re-creating them.

If you are a regular reader of my blog you will know that I adore vintage and antique quilts, which inspires much of my quilting work. The GFG quilt is a shining example of the intricate, labour intensive sewing work many women did all those years ago. I particularly love this design because they are all so different; the endless colour combinations and ways the blocks can be set together makes each one completely unique. Couple that with some divine feedsack fabrics and you're on to a winner!


The GFG quilt above is most definitely in my top five favourite quilts of all time! Those bright colour's just pop against the white so well. Traditionally the centre's were often yellow, surrounded by a ring of solid colour and then pattern. Between the blocks there is often a single or double 'garden pathway', most often it was white or green but women creatively changed this up to suit them. I just love the flowers with the dark colour way below. 


Below are some flowers I've made and others are from my vintage collection, which I was fortunate enough to win at auction a few years ago. I got a lot of pre-basted hexagons and cut fabrics ready for sewing! Feeling sufficiently inspired now? Good! 


Have you got your supplies from last week ready? OK, great - let's get started!

Rotary Cutting Fabric For EPP

So, you want to know "how can I cut my hexie shapes quickly and easily?". 

1. Firstly, fold the width of your fabric over. Take one of your selected hexagon shapes, and line it up 1/4" from the edge of the fabric. 

2. Using a rotary cutter cut the fabric 1/4" from the side of the hexagon. You should now have one long strip. 


3. Fold the strip in half again, you should have 4 layers of fabric. Using the hexagon paper template again, line it up on the fabric 1/4" away from the edge of the fabric - and begin cutting segments from the strip. 

4. When you get to the end of the fabric strip, cut off the very edge - to lose the folds of fabric. Add this to your pile of 'rectangle' segments. 


5. You can stop here if you wish, and baste the hexagons using it as is, or you can trim further. Using a small rotary cutting mat - place a stack of 4 fabric layers and rotary cut the edges to form the hexagon shape, turning the cutting mat as you go. 

I use the ruler on one side and then judge by eye the seam allowance for the opposite side, and then repeat this for the other side. This allows for two less turns of the cutting mat - saving time. Also, this doesn't need to be a precise 1/4" seam allowance as with regular piecing, just remember to leave enough fabric for turning over. 


Acrylic templates are a great way of cutting fabrics for EPP; useful when you don't require multiple's of the same fabric. For my own hexies, I use my Sizzix machine, which is a great little die-cutting machine, which is able to cut through fabric (amongst a multitude of other materials) I have a couple of hexagon die cuts which I use for my 1" hexagons.


So now we have our fabric shapes cut, we can baste them! There are two ways to baste EPP shapes hand sewing or glue pen basting. I have done both, and I like to switch and change between methods personally, depending on my mood - and how organised I am. For instance if I'm going on a long car journey I won't bring my glue pen to baste as I find it's a little tricky on the move, so normally I would prep my hexies - glue basting them, sometimes though, I'm just not that organised so I'll sew en route which is totally fine with me. My diamond quilt I'm currently working on was all basted by hand. The Christmas stockings I made last year were made with the Sewline glue pen, as well as my current EPP project. Just find whatever suits you. 


Hand Sewing Tutorial (The Corner Tack Method)

I love this method, I know there are lots of people that sew through the papers - but I find this way a lot quicker - there is no need to remove the basting stitches once the hexagons are joined together. The paper templates can be easily popped out, so they will last a lot longer and you also won't dull your needle by continually sewing through paper. Simple ;-)

(Note: I am a leftie! Apologies to right-handed sewers - you would just start from the opposite way, beginning your first fold from the right hand side, instead of left as pictured. I am using a bright red thread for easy viewing, although you can use any thread colour for this part as it will not be seen from the front. Also, all images below are enlargable for close-up viewing!)

1. Thread your needle and knot at the end.


2. Place your paper template over your cut fabric shape, bend over the first side. 


3. Fold over the next side and bring your needle down to catch that folded corner you've just made. Back-stitch through the fabric - not the paper template. 

I like to think of this as the sewing equivalent of the "hospital corners" in bed-making. Remember those?! Well I use flat sheets on my bed on occasion and this method of folding and folding again for a neat and sharp finish is exactly the same principle. 


4. From the starting point, sew through the fabric again. 

Great, that's the first corner done!

5. Fold over the next side of fabric as before.

6. Needle in ... pull the thread ...

7. Needle in the starting point again, through the fabric and pull. 


8. Fold the next corner over and repeat the basting technique until all edges have been folded and back-stitched.

9. Finish your work by repeating a couple of stitches to secure. 

Glue Basting Tutorial (Sewline Glue Pen)

Next up, glue basting! Now this really is a quick way to baste a whole bunch of hexies, and I love it! People have asked me is it easy to remove the papers after. Yes, they are. Though if you're working with really tiny shapes it can get a little more difficult, to save time pulling out tacky papers you can use one of these paper-craft hole punches. Just punch a hole in each hexagon and you'll be able to pull out the papers no problem. It's also a good practise to do this for hand sewn basting too. As well - have you seen these needle grippers? I haven't got a pair yet myself but I think they would be a great little tool for removing the papers. 


1. Glue down one side of the hexagon. Hold the glue pen between your fingers just as you would do a regular pen. Swiping the glue from the side, this way you won't put too much on. 


2. Fold the next side over and glue.


3. Repeat for all sides of the shape. Note I don't let go of the glue pen, I keep it held in my hand. You'll whizz through this once you've got the knack. 


See, wasn't that quick! The good thing is I find they last for aaaages too! You can buy the Sewline Glue Pens from Sew and Quilt, as well as the refills - which just click into place. 

As this is a super long and, hopefully in-depth post on this section. I will do part two of joining the hexagons together tomorrow! And I know you're all dying to know who won the giveaway last week!? Congratulations Elizabeth Morden! Please drop me an email with your address and I'll get your goodies sent out to you...

English Paper Piecing Basics: Week 2 // Hexagons, Grandmother's Flower Garden - Step-By-Step Tutorial

$
0
0
Welcome back to part two of our hexagon special on our English Paper Piecing series! We will be joining our shapes together today to form our hexagon flower. Just a reminder that all the images can be enlarged further by clicking on them.


How To Make A Hexagon Flower?

1. Place two pieces right sides together. I'm starting with my 'flower centre' and working on my first 'round' using a solid colour.

2. Start with a knot at one end of your thread, use a co-ordinating thread colour to match your fabrics. 


3. Needle through the fabric with right sides together. 


4. Pull tight and move up the hexagon side continuing this whipstitch. You'll want to aim for about 14-16 stitches per inch, I think that's about every 2mm? You'll start to recognise a 'safe' distance once you do it repeatedly. 

I've been asked a lot on the the first post, "how do I keep my stitches neat and invisible?". 

Answer: Try to catch only a couple of threads of fabric in each stitch, you don't need your needle to be 'eating' deep into the side of the hexagon - this is how they become visible. Likewise don't catch less than one thread of fabric, your work will eventually pull and become loose - trust me, I've been there. 

Also try to keep an even tension on your stitches, using the same distance each time; as with knitting I guess (not that I have any idea on that subject!). You will get more of a rhythm, and it will look neater from the front. 

Lastly. Practice! Lot's of practise, practise, practise! I can't tell you how much I have improved by doing it repeatedly. 


5. The corners! Make sure you get right to the tip of the corner - notice how in the picture above I'm not catching the folds at all in my last stitch. This helps keep it neat. 


Now onto the next hexagon, with an inset seam! These are easily achieved with EPP as you can bend and manipulate the papers to sew accurately. 


6. Starting on the outside edge; whipstitch as before until you reach the corner. Sew 2 or 3 stitches at the corner (where you are meeting the next hexagon) for a nice tight seam. Remember to only catch a couple of threads of fabric, not too much - so it won't be visible form the front.


"Oh, but there's a gap between my hexies!?". 

Not a problem. It's paper remember - just turn them together together and wrangle them so they meet; paying close attention that the tips meet perfectly. 


7. Right let's carry on whip-stitching up the other side. 

Remember to keep that nice even tension pulling the thread taught with each stitch. I've noticed in my previous EPP projects I've not pulled it tight enough and the shapes are slightly loose - which makes the stitching visible. Learn from my error!


It isn't very easy to demonstrate in photo's but to help keep my stitches even I like to run the needle along the side of index finger, which I find helps me keep balance, and stops me 'eating' into the fabric too deep. So imagine in this photo - my thumb out the way a bit, my index finger extended more and the needle on top of it...


Notice how I catch all three sides when I get to the inset seam - but not the fold of the hexagon, just the very corner.  It helps pull everything tight and neat, ready for the next side. 


Now continue with the next round using the same technique. 


Voila! One completed block. You can add in more rounds, then add in a neutral or contrasting 'garden path' in one or two rounds. Change it up as you wish! 

"But what about ladder stitch?", I hear you ask. I haven't tried it myself as it seems a longer way of doing it, and I'm pretty happy with how stitches look from the front to not try a new method. If you're interested in trying it out I've found a tutorial online here

Liberty Tana Lawns & Voiles

We all love those Liberty fabrics and voile cottons don't we? I know lots of people like using them in their EPP work too - including me! However, a word of caution because of their very sheer and lightweight nature, the fibre's of the thread could eventually tear the fabric because of the excessive drag when the papers are removed. I've included this method below of reinforcing your hexagon sides to make a very strong seam. Try it! 

1. Start your hand sewn basting as you would normally. Knot your thread, needle in one edge, and backstitch. 

2. Instead of whipstitching as you usually would - insert the needle in the next corner of the hexagon side, and backstitch to secure. 

3. Now whipstitch down the side of the hexagon towards the first corner. Notice you are catching that long 'reinforcing stitch' inside each whipstitch. Under and over, under and over...

Really strong! and you can't even see it ;-) 

Contrasting Fabric and Thread Choices

So what if you are choosing two completely different fabric colours, what thread do you use? From what I've read it's been told to take the darker thread of the two. However, I've found I get better results from going lighter. I thought it would be best to show this in action!  Here I have joined bright red and white fabric shapes together. 


On the right I have used a matching red thread, on the left I have used an off-white thread. As you can see the off-white is practically invisible, whereas the red thread is visible slightly. So I would always go lighter when there is a contrast. If you have to contrasting bright fabrics - a grey thread is always a good go-to option if you're stuck. 

I hope I've covered this section in detail so I've answered most of your questions on this and how to achieve a neat finish. Just drop a comment below if you wanted to know anything else, likewise feel free to share your tips for other readers. I love hearing new things! Next Monday we are doing diamonds!! My favourite! See you then, xo

50 States Stitching: Week 3

$
0
0
I'm a little behind on my 50 States Stitching project this week. We were away for a few days last week so I'm playing catch up, while working on some tight deadlines coming up soon too! Week 3 was New Jersey; I can't even say that place name in my head without putting on my best Jersey accent! >.< can you?


I love how this little guy is shaping up for Connecticut, that Happy Go Lucky plaid print looks so fresh! Hopefully I'll be back tomorrow with my latest FWQ blocks, here's hoping! ;-)


Sew Cute To Cuddle - Book Blog Hop + Giveaway!

$
0
0
Hello! It's my stop on the Sew Cute To Cuddle book blog tour today! Mariska Vos-Bolman is the Dutch designer responsible for this fun new soft toy pattern book. She's been making toys for over seven years, initially creating them for family and friends before developing her skills designing her own characters and making sewing patterns and kits. After great sales success she quit her day job as a 3D computer modeller to become a full-time soft toy maker and author! I always love to hear about these creative career success stories, don't you? Well done Mariska!  


The book is comprised of twelve soft toys and animals to sew. The toy chapters are arranged according to level of difficulty, starting with Joey the bear to Daron the dragon; the more challenging pattern due to it's 3D nature and sharp points. Mariska's inspiration for the character's in the book, otherwise known as 'Fluffels', were drawn from Japanese pattern books, so you can expect a strong kawaii, plushie style through the book. My favourite's are the animals and monsters towards the end of the book as I think kids would love them as well as the grown-ups too, given the right fabrics. 


To review the book I figured I needed to make something to give you a better insight, so I chose Patrick the monkey. I posted a progress photo on Instagram the other evening while making him and lots of you thought he was just the sweetest little thing, and I did too which is just why I picked him!


He was really simple to put together, though I always forget with soft toy making how long it takes! Because he is quite fiddly, with skinny legs and arms it's quite a slow process to stuff. I think I got through at least a whole 45 minute TV episode just stuffing those arms and legs, little by little! (What TV show, I hear you ask? Nashville! It's just great.) But the result is always so rewarding, admittedly I may have given him a little cuddle  when I finished him after midnight on Thursday evening! >.< 

At the back of the book there is a complete guide on stuffing, sewing techniques and materials that would be helpful for the more novice sewer. As well as easy, step by step graphic images and written instructions for each part of the sewing process. Mariska also features a cutting diagram for each project to allow for careful cutting without waste, which I thought was particularly helpful. I thought it would be useful to mention as well, that although the patterns are full-size scale, they don't include seam allowances. The book didn't seem to mention the use of freezer paper for transferring pattern pieces, so if you haven't used it before - just trace your pattern pieces onto the freezer paper cut out, and iron them to the fabric. You can then cut out the fabric pieces with the added seam allowance so much easier! 


The pattern called for machine appliqué details for the face, ears and belly but I'm personally not a fan of that appliqué look so I chose to hand sew to hide the stitches. I also didn't add a belly to the monkey to keep it simple. I used one of my favourite fabrics; Darlene Zimmerman's Chocolate Spot for the main section and Essex Linen in Flax for the face and ear sections - I really love how he's turned out! It just goes to show how much you can change things up given different fabrics, and finishing techniques - you can make it completely your own. Also he used up such a small quantity of fabric, I think I only used a fat quarter for the main part! When you compare £3.00 for a fat quarter of fabric with cost of buying soft toys it's such a great deal and you have the proud feeling of making your own. 


So the kind folks at F+W Media are offering a free copy of the Sew Cute To Cuddle book to one lucky reader! 

How To Enter

All you have to do is comment on this blog post below - maybe you could tell me what you're working on right now or a good TV show recommendation?!

You can find all the details about the blog hop here, and if you can pre-order this book (available for release September) here. Competition is open internationally and the closing date is Saturday 16th August 2014. Best of luck! xo

English Paper Piecing Basics: Week 3 // Diamonds; Tutorial & Tips

$
0
0
Hello! This week is all about my favourite English paper piecing shape - the diamond! Yay! If you are a regular reader of my blog you'll know I have a diamond star quilt in the works ;-) and a mini wall hanging using 1-1/4" diamonds. I love the classic look of stars in quilts and English paper piecing is a great way to achieve the accuracy you need to get those perfect points and joins. 

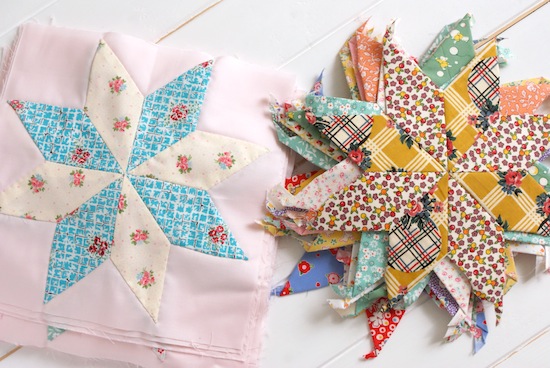
Diamonds are measured by the degree of the angle. For example at Sew and Quilt we stock the 8-point and 6-point diamonds, but they are available in many more sizes. You can tell from my star blocks above that I'm using the 8-point diamonds, because when they are joined together continuously they form a star with 8 points.

Diamonds are the easiest shape to rotary cut, as we did last week with our hexagons just line up your shape a 1/4" from the edge of the fabric and cut 1/4" away from the other side of the shape. 

So you have one long strip. Begin cutting your strip into diamond shapes using your rotary cutter, and the ruler for a 1/4" allowance.  

For the purpose of this tutorial I am only using the glue basting method. You can find the thread basting tutorial in last week's post. Also, I would usually punch a hole in the paper shape, as demonstrated last week - but I've now misplaced my hole puncher since the tutorial! 

Glue down one side of your diamond shape. Remembering to use the glue pen just as you would a regular pen. Swipe the glue on from the side so you don't put too much on. 

We want to make sure our tips all point in the same direction, so now continue on the next side (folding towards the next tip).  

Keep those points tight and sharp as you glue baste. 

Opposite side, glue and fold.

Final side, glue and fold. See how the tips, also known as 'dog ears' are all facing the same direction. Do not cut these off, it's important to keep them while we are joining our shapes together. 

This allows for the points to all meet and nest together nicely, can you see on the two joined diamonds below? 

 Begin your work with a knot. I like to start in the middle of my diamond (not the end with the dog tails). 

So needle in, take a stay stitch and begin whipstitching just as we joined the hexagons together last week. 


Continue whipstitching until you reach the very tip of your diamonds. 

 To finish I usually do a couple of stay stitches, and go back through a stitch - as you can see pictured below. 

Tip:Try to make sure you do finish off your work securely, as your stitches will loosen over time and will be more difficult joining your diamonds together to form a star. 


Now let's add in our third diamond! Just as you did before, whipstitch until you get to the points. See how I've pushed all the tails away from my stitching - this keeps them out of the way incase they get caught up in a stitch and peek out from the front! and notice I'm only catching a couple of threads of fabric with each whipstitch, this is especially important when you get to the points as it can get quite messy! 

When joining your diamonds together you always want to join them in two halves. This is much easier than sewing them continuously and having to tackle a difficult inset seam meeting at the centre. Trust me I've done this :-/ you will always end up with a small hole in the centre that way...

Match up your halves nicely, paying special attention that the centre's are directly opposite. Whipstitch the two halves together.

Tip:Push all those tails out the way when you get to the centre and try not to eat into too much fabric, so your stitches won't be seen from the front. 

Here you can see why we baste our diamonds in the same direction each time; the tails create a nice fan shape and can be easily pressed to reduce the bulk. 


Voila! Your finished star! 

Diamonds are such a versatile shape in the EPP family. Below is another variation you could make with the 6-point diamonds. The images below were kindly borrowed with permission from Martha at QisforQuilter.com (originally I posted this on my Facebook page as I've been asked often; how to achieve a tumbling pattern using EPP,  so I figured it would be useful as part of this blog series too). 

It's a great variation on the traditional tumbling block quilt design. I love the vibrant 1930's colour palette of solids and prints with the scalloped edge. 


Here I've highlighted how this is easily achieved with the use of English paper piecing, can you see the 6-pointed star?

Image (edited for purposes of this tutorial): Vintage Tumbling Blocks Quilt Inspiration, QisforQuilter.com

This is the block! I thought I'd make one up just to get you started, it's made using the 2" 6-pointed diamonds. You can then add more diamonds to complete the block and carry on the design by using 2" hexagons for the 'path'. 

 Another popular design using EPP diamonds is to create a hexagon shape. 


You can see here I've just tilted my block from my previous image above and joined on (6) 2" 6-point diamonds. This creates the shape required to make a continuous star design. The vintage quilt above uses a white background which highlights the stars, but you can use alternating fabrics; like this one which will create the 'hexagon' design. 

I hope you've enjoyed my guide on English paper piecing using diamonds. If you have any questions at all please drop me a comment below :-) Next week we'll be doing some fussy cutting! Hope you can stop by. xo

Blog Hop Around The World, A Q&A with Me, Jessie!

$
0
0
Hello friends, today I'm sharing a little more about me and my creative pursuits by joining in the 'creative blog hop around the world'. Lots of blogger's have been joining in, and then nominating three more bloggers to carry on the discussion. It's really a great way to discover new crafty people you may have otherwise missed, and find out some interesting things us blogger's don't always share on a day-to-day. I was invited by the lovely Helen Philipps (who posted her Q&A last week) to answer these questions so I'll get straight to it! Thanks for inviting me dear Helen! 

What am I working on?

Wow, where do I begin! My longest work in progress currently is my Farmers Wife Sampler quilt. Recently I've set myself a goal to complete two blocks per week - I'm also planning on hand quilting it so I know it's going to be a lot longer yet! But I'm fine with that one being a long project ;-)


I'm in the middle of quilting my Naturally Nautical quilt #naturallynauticalquiltalong. It's my first! free motion quilting quilt I've worked on - so the pressure is on! I've always shy'ed away from FMQ but I know I have to start somewhere, and baptist fans it shall be!

Another long quilt project I have on go is the 50 States Stitching Club, designed by Mollie Johnson. Each week we are given a new embroidery motif for a chosen state, we are then turning it into a little EPP star and appliqueing it to form a quilt block. So fun!

I have a couple of quilt tops that need dealing with too - I always seem to love leaving them round the house for months until I get them quilted! The Spell It With Moda alphabet quilt need's to be basted and quilted, and I've got to get my bum in gear (and save my pennies!) to arrange my Scrappy Irish Chain quilt top to be long-armed. It's huge, so I really can't do it myself. 

I've got a few editorial projects in the works right now too, with some big deadlines looming quite soon!

I've always got a ton of English paper piecing projects on the go. I've just completed a little 'Seven Sister's' mini quilt top, so I need to get that finished. If you haven't seen already I'm doing a series on English paper piecing basics on the blog each Monday. So I will be photographing the process of finishing it to use for one of my last posts on the topic. I've got one completed double wedding ring finished using EPP as well, not sure if I can go the whole hog with a full quilt!? Plus, I always pick up some hexies to make some Grandmother's Flower Garden block whenever the mood strikes me!


Is that enough!? eek.

How does my work differ from other's of it's genre?

I'd like to think I have a bit of a distinctive style? Regular readers of my blog might know I adore vintage quilts, and I think I certainly incorporate a sense of that in my quilting and general sewing work - whether that be toy-making, sewing something practical for my home or the occasional dressmaking project I take on, it will always have an element of nostalgia from previous era's. When I'm not quilting I like reading up on quilt history, when I can find the time. I'm particularly interested in quilts from the U.S. around the 1920s and 1930s, when quilting suddenly become big business and textile mills produced a wide variety of pretty fabrics in the soft, pastel colour palette we can all recognise from that time. Likewise I love the so-called 'colonial revival' quilts from the 1920's that were adaptions of quilts made in the late 1800s, so I think my love for antique and traditional quilting has definitely influenced my style. 

I think I'm always drawn to a toned down version of things as well? I like to use a lot of neutral for backgrounds and sashing to allow the fabrics to really sing. However having said that I do enjoy making scrappy, happy quilts full of colour and varying prints - but then I would probably display it in a more subtle way in my home, which I think can almost make it feel fresh and modern again? 


Why do I write/create what I do?

Because I would explode if I didn't. Really, I would. I need to be doing something creative with my hands all the time, whether it's sewing something up on the machine or whiling away a few hours hand sewing in the evening. I like to keep busy! I was never one of those kids that said I was bored - ever. There was always something to do. Just ask my mum ;-) plus, I would have been given chores to do if I was caught saying that! 

As well, I love being able to interact with the online quilting community, with all the social media channels it's great being able to talk crafty things and be inspired by others. Having my blog is great way to document my creative journey too, I would never have remembered all the projects I've done over the years if I hadn't blogged about them. My memory is like a sieve. True story.

How does my writing/creative process work?

Creatively speaking, it varies. I might come across a pattern that instantly grabs my attention via a book, Pinterest, the blogosphere or anywhere and then I will have a look through my fabric stash to pick out a colour palette/fabric choices that I would think to suit the design. Other times I may have got some new fabric in for Sew and Quilt, which I immediately fall in love with so I will plan a project around that. It might be a quick little project like a pincushion or a larger quilt design, whatever I fancy - and deadlines depending! I'm always wanting to try new techniques (to me) as well, for example I haven't done much in the way of applique so that's something I want to try more of, so I will go about sourcing some design ideas online, and go from there.  

In terms of writing for blog posts, it's not as organised as I would like. I'm quite a sporadic blogger and try to fit it in when the time allows me. I take as many photo's as possible when the weather is kind to me, and then write up the blog posts during the evenings after my day job. 

-------------------------------
Wow, I think I've waffled on enough now, so it's my turn to choose 3 more bloggers to keep the ball rolling! I was very un-organised arranging my invitations, so just waiting on my final blogger - perhaps one more because I'm greedy! ;-) I'll update once I have confirmed. I wanted to choose blogger's who's work I really admire, and were very different in styles and craft. So be sure to look out for their Q&A posts soon! 


Mollie Johnson of Wild Olive - Mollie writes a fantastic blog, which I've been following for a number of years now. I'm a huge fan of her unique projects she comes up with and delightfully cute embroidery work. You must check out the 50 States Stitching Club she's running at the moment.

Sherri McConnell of A Quilting Life - Sherri is another brilliant blogger who I've been following for many years, I also love following her on Instagram! She's a prolific quilter and always inspires me with her latest quilty goings on. Remember my Cherry Blossom mini quilt? Yep, Sherri was my inspiration for that after seeing her version ;-) on IG. 

English Paper Piecing Basics: Week 4 // Fussy Cutting Tutorial

$
0
0


Hello EPP'ers! This week we're going to be looking at the simple but highly effective technique of 'fussy-cutting'. What is fussy cutting? It's to do with the selective cutting of a fabric based on a particular element or motif you want to highlight. I think this image below demonstrates that in it's simplest form. You can see I have highlighted that central rose within the fabric which will then be used for my English paper pieced shape. 


When it comes to fussy-cutting the most important part is selecting the right fabrics. Look for fabrics with repeating patterns; geometric prints, larger florals and stripes work particularly well. As most EPP rounds or blocks are made from 4, 6 or more shapes, you will need to take this into account when selecting your fabric for fussy-cutting. For example, if you are making a 6-pointed star (as used in our tutorial below) be sure to check you have enough fabric for the pattern to repeat 6 times. You don't want to run out! If you're shopping for fabric - look at the pattern, would it be better to buy it as a long quarter instead of a fat quarter? 

Now in all honesty I don't do a lot of fussy cutting, for the reason that I don't have a lot of larger repeat fabrics in my stash. If you are a regular reader of my blog you'll probably know I loooove small-scale prints, however the motifs are usually too small and repetitive so wouldn't be any good for fussy cutting. 


I have used these Lecien Old/New 30's fabrics on a couple of fussy-cutting occasions now, they feature a great scallop border design which is *perfect* for diamonds, those big rose heads make for great hexagons and the smaller rose buds are great to use for a more subtle look. 

Now this block below (not completely sewn together yet) although it has a very small motif for the centre blocks the repeat is spaced out enough to make a feature of one flower for each honeycomb shape. The blue honeycomb shapes are also fussy-cut which give the illusion of fanning feather's. 


Tip: It's good to mix up different elements of fussy-cutting such as larger mirrored images and smaller motifs in one block to give the eye somewhere to focus and create balance. 


Stripes are great for fussy cutting. They give such a dynamic look and can be fussy cut lengthwise through the stripe or across for a completely different look.


As I don't have many fabrics on hand that lend themselves well for what I like to call 'mirrored fussy-cutting', often I like to use motifs this way as shown below. You can see I just picked out the strawberry motifs for my outer hexagon ring using a metal window template. Note I've pieced the hexagons with the storks facing the outside on all shapes. You could easily make a window template like this at home yourself if you needed a DIY version - an empty cereal box would be ideal. Just cut out the desired shape size from the centre using a stanley knife, while keeping a wide enough seam allowance around the edge, about 1/4" - 3/8".


Right, now for a little fussy-cutting tutorial! We'll be using the 2" 6-point diamond shape for this tutorial. Stars are a great shape for fussy cutting, they work really well to create that mirrored, kaleidoscope effect. 

Materials wise, you will need the following;

Fabric scissors / or rotary cutter
Sewline glue pen / or thin double sided tape
Acrylic template / or metal window template
Water erasable marking pen(or pencil or any marker - I just have to use a water erasable one!)
Starch spray(optional)

Begin with your fabric pressed well, it's good practise to starch your fabrics before you start also. It gives the fabric a nice light paper feel, making it easier to handle and cut. 

Find a repeat motif within your fabric. You can see I'm using the acrylic template as a guide for the diamond shape while seeing-through the fabric. 

Tip: If you're a newbie fussy cutter, perhaps avoid an overly prominent focal point at the centre point (the point at which all your diamonds meet in the middle). It puts a lot of pressure on for perfect piecing and fussy-cutting alignment! 

Here I'm using the yellow flowers as my main repeat pattern. The bottom of the stem is my 'lining-up spot' for the bottom tip of the diamond, and I'm using the yellow flower on the right-hand side as my guide for the angle. Now I know I have to line up those two elements for each shape and they will be identical. 

Draw around the template.

Cut around your drawn shape, (apologies the line isn't very visible in this photo).

Dot a little glue in the middle of your shape (a spot of double sided tape could work here also). Hold it up against the light and centre it where you need.

Remember for my shape I'm aligning the stem of the flower at the bottom, and making sure I've got that yellow flower on the right just inside my diamond. Now carry on the fussy cutting design for your remaining shapes.

Baste your shapes, tutorial here.

Join your shapes together, tutorial for star here and hexagons; here. Fussy cut star complete! 

So I know not everyone is into fussy-cutting, one of the main reasons is the perception of fabric waste. This is my 'waste' from the diamonds, I can still get loads of use out of this fabric and if you cut directly into the shape you can eliminate part of this waste. Now can you spot a mistake here? When you're fussy-cutting a repeat pattern you will follow it in repeat fashion, at the same angle - clue's in the title eh!? I mistakenly cut another diamond which was not the fabric motif I needed. Be sure to cut carefully folks! ;-) 

Next week we are going further with our shapes! With a free pattern, yay! I hope you're enjoying our English Paper Piecing journey and picking up some new tips? Just drop me a comment if you have any questions and I'll reply on this post. Have a great week. xo

Sew Cute To Cuddle - Book Giveaway Winner

$
0
0
Congratulations Marymint! You are the winner of the 'Sew Cute To Cuddle' book! Please drop me an email to claim your prize (as I can't access your blogger profile). Thanks for everyone who entered! Have a great Sunday guys, xo

Moda Modern Building Blocks Quilt Pattern

$
0
0
Hi friends! Just wanted to stop by super quickly and remind you all (if you didn't know already) the *completely, and utterly fabulous* Moda Modern Building Blocks quilt pattern is due in very soon (as in; arriving with my U.K. supplier on Wednesday next week, yay! Finger's crossed it will be with me on Friday!). You can pre-order it here in my Sew and Quilt shop


I ordered this as soon as I saw it popping up all over Instagram from Quilt Market earlier this Summer. It's such a show-stopper, I can't wait to start on it! Must get a bunch of secret sewing projects out the way first then I'll be making a start ;-) Apologies for not posting this week's EPP Basics Summer Series post on Monday, I've not had a moment this week. Posting will resume Monday! Have a great weekend guys. xo

English Paper Piecing Basics: Week 4 // Matching Shapes + Pattern

$
0
0
One of the great things about English paper piecing is being able to match a variety of different shapes together - just like a jigsaw, to create endless possibilities for design. So that's what we're going to focus on today, and the best way to do that is grab a bunch of EPP shapes and have a play around!

This is a design I've been working on recently. I'm calling it the #HexagonSpiralQuilt! It's a really fun design which finishes up in a completed hexagon shape so you can easily create multiple blocks and fit together ;-) This block uses 2" hexagons, 2" equilateral triangles and 2" 6-pointed diamonds.

I won't go into detail of what shapes match what, as I discovered the Paper Pieces website have already done all the hard work! You can find the table here. Instead I thought I would share with you a few pattern ideas for you to try. 


One of the questions I was asked at the beginning of this series was how to deal with tight corners and 'inset seams'. I think I best explained the technical side in this post using diamonds, which follows the same principles. If you struggle with them my best advise is to practice, practice, practice! and try to plan out your route of sewing before diving straight in realising you've left yourself with some tricky inset seams which sometimes can sometimes be avoided. For example, take my Seven Sisters epp project I'm working on. This may look like I had some very deep seams to meet ...

… in fact it was quite simple to piece. I joined my stars just as you see in this picture below. 

Though the fun thing about EPP is there are no 'rules' for sewing sequence, unlike regular machine piecing where blocks are made in stages and a predetermined sequence. So there is no wrong way to sew your designs together! 


TIP: A general rule is to remove the paper piece templates as soon as that piece is surrounded by sewn units on all sides. This allows you to manipulate the block easier when you are adding more shapes. Though there's no harm in leaving them in while you work, if you have enough papers!


How to remove the papers? Easy. Press your block so it's nice and flat to help set everything in place. Turn your block over and pop the papers out with the edge of your finger - nails are great for this! Using the Sewline glue pen can sometimes be a little trickier to remove the paper, so make sure your block is pressed well to keep their shape. If you punch holes in your paper templates, as I recommended on this post you can just pull out the papers with a crochet hook or tweezers! If they're a real nightmare to remove, you may have used too much glue. 


If you're careful when you remove them, you can definitely re-use your shapes again and again. I like to give mine a quick press to iron out the creases and put them under a heavy book to stop them curving from the heat of the iron. 


The Lucy Boston Patchwork Of The Crosses quilt is a fantastic design which has become popular to make again in recent years. I know this because lots of my Sew and Quilt customer's are making it! :-) It's got some tight corner's to meander so it's not the easiest of EPP designs, but oh so beautiful! You can make up the entire design in 1" honeycombs and 1" squaresIf you don't have the book, I found this free tutorial for the Patchwork Of The Crosses quilt, with diagrams for the 3 basic blocks that make up the quilt and full instructions! Below, is a simple sewing sequence guide on completing the main block for the quilt. The method of joining the pieces allows for lots of continuous stitching. This way you won't have to break threads and start from a new section so often, which will speed up the joining process.

Of course, I forgot to photograph the initial stages of putting the centre piece together, so hopefully the diagram with the sewing sequence in numerical order will help. (1) Sew the centre pieces in pairs, and (2) join together to form the X shape (just like we did with the diamonds to make a star shape here). (3) Add the corners, sewing them in a right angle. 


Sew the next 4 pairs together, and join to the main section. 

Repeat and sew the final 4 pairs together and join to the block. 

You may also find that row by row assembly is a more practical to piece. It's a speedy route if you are doing tessellation design. Such as this hexagon flower which will be set on a plain background.

I hope this guide has helped you, and perhaps inspired you! Next week - on time! ;-) We'll be covering curves. See you then!  

Fat Quarter Style Book Giveaway!

$
0
0
Hello, hello! I'm back in today to share 'It's Sew Emma's' second book offering; Fat Quarter Style. Fat Quarter Shop have generously offered me a free copy for a lucky blog reader. 

It does exactly what it says on the tin, it's all about fat quarter style! There are 12 fat quarter quilt patterns included, all of which have 4 size options; crib, lap, twin (single for us U.K. folk), and queen (I think that's a double to us, right?). It's a great little book with some really eye-catching designs, a lot of them seem to follow this super-size block trend which I love so I think it would make a fantastic book for beginners - and the more seasoned quilters ;-)

I have a lot of wedding planning and 'secret' deadlines at the moment, so I don't have the time to make one of these fabulous quilts right now, but I for sure have 'Tapestry' (image above) on my list! I think this is my favourite pattern from the book. Wouldn't it look so great made up in some Bonnie & Camille fabrics!? April Showers collection, maybe? Oh, maybe even just one block and turn it into a mini quilt for my sewing room! ahh! Must.Resist.

'Raindrops' is another great pattern which caught my eye, quite different to my usual style but I'd love to make this up in a fun 1930s solid colour palette. Cool huh? 'Primrose' is a cute design too, it reminds me something Lori Holt would make :-)


Talking of which, if you have either of Lori's books you will notice the same layout and instructions for making each pattern as they're brought to you by the same publishing house - It's Sew Emma / Fat Quarter Shop. So you can expect very, very clear instructions, diagrams and cutting information just like Lori's - which I completely love so this makes me very happy!


Fat quarters are my favourite pre-cut size so it's great to have this book on hand and know I will definitely have the yardage required for a project. Wouldn't you love to have this on your bookshelf too? Yes? OK. Here's what you have to do.

How To Enter

Drop me a comment on this post below telling me; what's your favourite pre-cut size? Examples: FQ, half-yard, charm pack, jelly roll, mini charm packs, layer cakes? 

Follow the blog (if you aren't already!); On Bloglovin or you can find me on Instagram @messyjesse1

This is open internationally, I'm willing to send anywhere! Competition will close Thursday 11th September and the winner will be announced on the blog Friday 12th September.

English Paper Piecing Basics: Week 5 // Curves + Clamshell Tutorial

$
0
0
This week I'm going to hopefully take the fear out of English Paper Piecing curves! There are endless design opportunities to be had when using curved EPP shapes; they are ideal for appliquéing to a larger quilt design or using them in quilt borders. I'm particularly taken by this and this vintage clamshell quilts, so let's try and overcome this so called 'daunting' method so we can recreate beauties like those shall we!? 

Some of the popular curved EPP shapes include; clamshells, apple cores, Dresden's, circles and hearts - all of which feature one of more curved edges. 

Today we're going to be looking at clamshells, which are a great shape to get started with if you haven't tried curves before - because they feature both inner and outer curves. 

Ok let's begin. So for this tutorial I'm using the Paper Pieces 3" clamshell shape. Start by cutting multiple squares that are roughly 1/4" bigger than your paper pieces template. Stack 4 layers together and cut around the shape leaving enough room for turning over.


I'm going to show you the two main methods for basting curves, glueing and hand sewing.  This is where the nifty little Sewline glue pen is a real timesaver! 


Place a dot of glue on the paper template and press onto the fabric to secure. 

Swipe your glue pen from one side of the outer curve. 

Swipe the glue halfway across the curve and begin pulling down the fabric - be firm when you turn the fabric over to avoid bumps and pleats showing through on the other side. 

Glue across the other half of the curve and pull down the remaining fabric. You will notice pleats to the back of the shape, this is fine - you need these to ease around the curved edge. 

Volia! A nice smooth curve, aaaaand you only need to baste the outer curve, how easy was that?! 

OK. So if you don't have a glue pen and fancy trying it the traditional method - this is how;

Grab a couple of paper clips to hold your template to the fabric in place. Take a length of thread, knot the end. 

Take a running stitch from one side of the outer curve - close the the edge of the fabric. 

Gently tug on the thread to pull the fabric over the template shape. 

Carry on sewing until you reach the other side and pull taut. Take a 3 or 4 stay stitches to secure. This method I find is a little fiddlier, but also gives good results. You may want to press the edge to help keep the seam flat. 

So once you have made enough clamshell shapes for your desired design (mine is going to be x5 wide). Take two, and place right sides together. Find the point at the side of the paper template - make sure they are both lined up precisely as this will make your sewing a lot easier down the line! Thread your needle, knot the end and take 3 very small stay stitches to join your shapes together, tie off. 

TIP: Join your points together in sets of two, it will be easier than a whole line of them, and will avoid over-handling them. 

Now we've done our first row of clamshells we want to add them to a background fabric. Cut a piece at least 1/2" wider on each side than your finished row and at least 1" wider on the top and bottom.

Press the backing fabric in half lengthwise, this will be our measuring guide to line up the top of the clamshells. But first we have to remove the paper templates!

To remove the paper templates, just give it a little tug and slide out. You can see above the traditional hand sewing method clamshells keep their shape perfectly, whereas the glue pen method are a little stretched - just give them those a little press with the iron. 

Take some quilting appliqué glue with a fine nozzle and dab some very small dots around the edge. 

Lay the clamshells to line up with the pressed line. 

Now you need to appliqué the shapes to the backing fabric. Following along the top scalloped line, run small appliqué stitches - we'll cover this in more detail on our 'EPP finishing week' ;-)

Once you've appliquer the whole row we can add the next row...

With the next row I'm making a set of 4 clamshells because my first row was 5. (The next row will be 5 and then 4 and so on). 

Place some dots of glue on the back edge as we did before. 

Line up the row so they just cover the tacking stitches we did to join the shapes together. Make sure they are nice and straight to carry on neat rows all the way down.  

Applique this row and continue again until you have the finished size you need! 

See, not too difficult at all is it? I hope this helped you. See you next week for more English Paper Piecing fun!

Fat Quarter Style Book Winner!

$
0
0
Annnnnd… the lucky winner of the fabulous Fat Quarter Style book giveaway was...


Congratulations Two Wednesdays! I have emailed you! wohooo, happy Monday indeed!


Thank you to all that entered, remember you can purchase the book here if you still wanted a copy. Have a great day friends, EPP blog series will resume next monday, sorry! It's been a busy weekend. xo

English Paper Piecing Basics: Week 7 // Finishing Techniques

$
0
0
Hello friends! Today I'm going to give you a little tutorial on how I like to finish my English Paper Piecing quilts and some ideas for other ways of finishing - on our 6th and final post in the English Paper Piecing Basics blog series

Applique

The easiest way to finish your EPP quilt top, while maintaining the uneven edges is to appliqué your top to borders - as seen in the hexagon example below. Decide on your border width size and allow a slightly longer length so you can miter the corners. Appliqué the quilt top to all four sides so you can then baste and finish your quilt as you would a straight edge quilt. 


With the diamond EPP quilt I'm currently working on, I am in the process of appliquéing each finished star to a square backing fabric - I will then machine sew all the blocks together and finish as I would a regular quilt top. 

You will notice in a lot of Grandmothers Flower Garden quilt designs there are two straight sides and two sides with jagged edges. This allows for a completed flower ring to run down the sides of the quilt, which was probably a practical reason for sleeping under! 


Binding

Another method of finishing is to use a matching binding. Here's a helpful tutorial on how to tackle odd shaped corners, which would apply when trying to negotiate those hexagon edges. 


Facing

For my favourite shape; the diamond, the binding method wouldn't be a good finishing technique because the points would be covered which could compromise the design. So for the project below using triangles and diamonds I have used an EPP facing technique to create a matching border to the back of the quilt, here's how I did it! 

Cut the backing fabric and batting slightly larger than the finished design, baste and quilt as desired. 

With your chosen fabric, create a matching border shape; baste EPP shapes and sew together to form a ring border.

Flip the border ring and quilt right sides together, whipstitch all sides. 

TIP: If you haven't quilted right up to the edges of the quilt keep the papers in as long as possible to make it easier to whipstitch the shapes together. 

TIP:Pay special attention to the corners of the the quilt, take 3 or even 4 stitches to make sure your corner's are well covered. 

Trim off the excess. 

Press the border facing well, making sure all seam edges are nice and neat. Now pop the papers out, taking care not to pull too heavily to put strain on the stitches. 

Un-fold the border facing to the back of the quilt. You should start to see your finished EPP quilt take shape!

Use a knitting needle to poke the corners, (this is why it was important to take extra care sewing the corners). 

Slip-stitch the the border facing to the back of the quilt. Fold over the 'dog-tails' (diamond points) underneath as you sew. 


Finished!! Perfect and neat! and all those points are still showing nicely. You can also use this method of finishing for hexagon quilts just as well. In fact, a half hexagon shaped border facing would be lovely for a large grandmothers flower garden quilt as it would leave a nice straight edge to the back. 

And of course, a very simple way of finishing your quilt with an uneven edge is to baste and quilt as normal. Then trim the backing fabric down to about 1/4" larger than the finished quilt top and trim the batting down 1/4" smaller than the finished quilt top, following along the uneven quilt top shape. Turn the backing fabric under to line up with the shape of the quilt top and slipstitch closed. 

I hope this has given you some helpful information on how to complete your EPP quilts! and congratulations on getting to this level with your project it always seems far in the distance when you are making up hexagon flowers or whatever design you're working on! Thank you for joining me on the EPP Basics series, I had wanted to talk about a couple more topics but time has not allowed me with our impending nuptials next month! >.< perhaps I'll delve into some other EPP areas once I've got that out the way ;-)

Here's a recap on what we've covered on the series;
Week 4 // Fussy Cutting Tutorial 
Week 5 // Matching Shapes + Pattern Ideas
Week 6 // Curves + Clamshell Tutorial

'Fun Of The Fair' by Melanie McNeice - Book Tour & Giveaway!

$
0
0
Doesn't this cover look so fun and inviting?! I thought so too! It's Melanie McNeice's latest soft toy book offering; Fun Of The Fairand today is my stop on the book tour to celebrate it's upcoming release next month with a giveaway for one lucky reader!  

The book features six ridiculously cute fairground inspired animals, all of which I'm dying to make! You can expect to see loveable lions, mischievous monkey's, sweet seals and more.  

Melanie states that the patterns are suitable for all skills levels, and although I've not had the chance to sew one up myself at the moment, I think they would be very straight-forward to sew. 


Each pattern has very helpful step-by-step instructions that even a very novice sewer could tackle, along with helpful tips to keep you on track. You can also hop over to tutorial section on Melanie's blog where she really goes into some detail for toy making techniques. 

Before I was contacted about this book I wasn't aware of Melanie and her hugely successful company; Melly & Me. If you have been living under a rock, as I clearly have!  Melanie is multi-talented business women who has created over 100 sewing patterns, designed multiple fabric collections for Riley Blake Designs, travelled across Australia teaching sewing, author to five books, all while running her Melly & Me online shop, oh and looking after her family with two children! Yowzers, I'll have a glass of what she's having! ;-) now I know you want to hear more from this wonder woman don't you? Over to you, Melanie...

How did you start your sewing career?

Well I always say that it was my sister who MADE me!!  :) About 10 years ago my sister, Rosalie Quinlan, was already a successful pattern designer and it was when I was home with my baby/toddler children that she persuaded me to start sewing.  I had always believed that I didn't have a creative bone in my body after working in Insurance and Information Systems, but she convinced me it would be a great hobby to overcome my feelings of "lack of accomplishment" and boredom.  I took to quilting overnight and purchased a sewing machine 24 hours after she started me trying - It was love at first stitch!  I think it was about 6 months later that Rosalie started her attempts to convince me to start designing.  I kicked and screamed for a while, but eventually started my hand at original designs - the rest is history! (thanks sis!!!!)


When did it go from hobby to full-time business?

I think somewhere in the first two years the tide suddenly turned very quickly.  It went from a lot of fun and just a hobby business to fund my growing fabric addiction to a full time focus.  That said I did put a lot of effort into getting my name known and promoting Melly & me.  We even went to the "International Quilt Market" in the US in an attempt to expand into the international market.  I think even when it was a hobby I took it pretty seriously and was fairly determined to make a go of it.

You have accomplished so much; from starting a successful sewing pattern company, teaching, designing fabric, writing books and more! – how do you manage it all?

Well that is an awfully good question!  I think being a work-a-holic helps, haha!  I have just added part time study to the mix and am finding time management pretty hard at the moment, but I seem to always get it done.  I am a pretty driven and self motivated person so I think I just always make the time and make it work.  I am also a compulsive over-comitter which gets myself in trouble - but I look at this as a positive at the end of the year when I see how much I have achieved.  Loving what you do helps tremendously - you always find time to do things you love and that excite you!

What do you enjoy most about your creative job?

I love the feeling of anything new coming to life!  Whether this is a new book being published and finally available, a new toy created in the studio, or new digital artwork for that next fabric collection!  I just love seeing something fun and new coming from nothing.  I love it most when those creations make people smile - I think that is my business plan - to make people smile!!


Your new book is just delightful! How did you come up with the theme?

Actually at the time I came up with this theme I was playing around with some "Fun Fair" based fabric designs for a possible new fabric collection.  The fabric collection was never completed and was never meant to be, but it birthed the ideas for this book!!  This book was instantly in my mind's eye and it was almost effortless to put together as I could see all the designs so clearly in my imagination.  You can actually find the digital artwork that I had been playing with for fabric as decoration within the book!

What big things do you have planned for the future of Melly and Me, can you share?

I am actually looking forward to seeing what the future might bring!!  I am just starting work now on my next book which will be available in about 12 months or so - another toy based book with 10 "fantasy" themed  projects which is super exciting!.  I am always working on the next fabric collection and the next pattern design, but outside of that I am looking for that great new idea to branch into something challenging and new!  I am not sure what it might be just yet, but I am hoping some new journey and direction for Melly & me will be just around the corner!


- - - - - - - - - - GIVEAWAY - - - - - - - - -

Melanie sounds like an sewing and organisational dream! This makes makes me want to get my butt in gear, and with my wedding happening next month I need all the organising help I can get!! 

With that in mind, for your chance to WIN a printed copy of the book sent by the publishers at F + W Media, simply leave me a comment on this blog post with any tips or ideas you follow to keep organised? It can be sewing / or non sewing related. Anything!

For an additional entry you can follow me on Bloglovin for all blog updates! Drop me an additional blog comment to tell me so I can count the extra entry. 

Competition closes Thursday 9th October 2014. Best of luck! 
Viewing all 205 articles
Browse latest View live