Quantcast
Channel: MessyJesse - a quilt blog by Jessie Fincham
Viewing all 205 articles
Browse latest View live

The FINISHED Scrappy Irish Chain Quilt + FREE Downloadable Pattern!

$
0
0
I'm SO, so excited to share with you all my *finished!* Scrappy Irish Chain quilt! 
I've been waiting on this day a very long time. Too long in fact. 

Yes definitely too long! So I may have gone a little overboard on the photo's, but you don't mind, right? ;-)


Wow, I'm ridiculously happy to finally tick this one off the list and share with you! Long time readers might remember me posting the tutorial to make this along with my finished top waaaay back in March 2014, and starting on the quilt in January 2014I finally had it quilted by Trudi Wood in July this year, finished just in the nick of the time for Festival Of Quilts in August. Trudi amazingly managed to squeeze it in her already huge schedule and I'm so thankful! Didn't she do a fantastic job! I knew this was far too big for me to handle, I just didn't have the space, energy, time or expertise (most importantly!) to quilt this mammoth 90" x 90" quilt! A job for the professional. I was also knee deep in preparations for the show so it made sense. I had it hanging in my Sew and Quilt booth at FOQ and it was just brilliant to receive so many lovely comments from people. Really, it was the cheering on I needed to keep me standing over the four days! I love having it on our bed now. That's the icing on the cake.

Photographing this quilt was no small task I can tell you! It took a total of 3 different photography locations, 2 willing assistants, 1 chair and (almost) a few tears once I'd stained  the back of it it from draping it over a rusty fence. Yep I know, it was a really clever idea by me. All in the name of blogging of course. Thankfully, I managed to get that stain off once we got home, phew. 

I knew I wanted to go with a traditional quilting style, so I asked Trudi for feathers and a grid work of sorts, so she came up trumps with some dreamy custom work. She used a looping variation in the chains, which works really well too. I couldn't make a decision on the binding right off, I auditioned several but in the end went for a solid as all the printed fabrics I tried looked far too busy. Kona Woodrose is slightly darker than the Kona Peony used in the chains, which works well to frame the quilt, I think. Can you believe I hand sewed the binding in one evening! OK, technically it was two as I still had a tiny bit to do the following morning, but it was almost one evening ;-) I think that probably goes to show how much I wanted to finish it! It's also my favourite part of quilting. I love being cosied under a big quilt, watching some good TV with a bit of hand-sewing in tow. That's my ideal night right there.

So this is one B-I-G scrappy quilt! I raided my scrap bin to make the top, and I can't say it's made a dent because it's completely full again! I need another scrappy project, quick. 

………….

Quilting: Trudi Wood
Fabric: Scrappy! Similar available at Sew and Quilt, Kona White, fabric in chains is Kona Peony, binding is Kona Woodrose

………….

To celebrate the finishing of my #ScrappyIrishChain, finally! I am now offering a FREE downloadable pattern for everyone! Hooray! Yep, it's been a busy weekend. I've had a free tutorial on the blog for quite a while now, so now I've spruced it up and turned it into a PDF so you can save it and print it ready to start sewing immediately! Or refer back to it when you do want to make it :-)

Now remember to share on social media using the hashtag #scrappyirishchain  
I would be absolutely over the moon to see your versions! 


Please do respect my hard work in creating the pattern, please do not sell or redistribute my pattern. Instead link or direct people to my website, I would be ever so grateful. Thanks so much, happy quilting! Jessie.

Apple Core English Paper Piecing

$
0
0

If you've ever wondered what my 'style' is, I really think this photo sums it up nicely. This is so me :-) I'm not pushing or promoting any kind of fabric, this is just me - all me, pulling from my stash. Like everyone, my quilting style and taste has changed and evolved over the years. I've never been one to really work from one collection, I always like to mix it up.

Its quite an eclectic mix, always with a vintage/antique feel. I love a floral too, can you tell? ;-) My new favourite are shirting fabrics, I know they're often featured in Civil War collections, I love those neutral cream tones with tiny ditsy prints. They're so versatile. I'm so changeable though, I'll no doubt work on something totally different next week!

Here I've started work on an apple core project, which will be a new cushion to live on my sofa. I haven't got a plan of sorts, I'm just making it up as I go along (same old). Its almost the size I need, so once I get to that point I'll think about how I'll finish it. I'm using the 3" apple core english paper piecing shapes from my shop. I'm glue-basting with these, I find it works so well with curved shapes. I'll post a few in action photo's on here so you get the gist of it, if you've not tried with this particular shape. For help with EPP you can view my blog series here, which includes a curved shape tutorial using clamshells as well. 

On a side note my Sew and Quilt EPP shapes are now sold in Europe (and soon Dubai!) as well as the UK! I've recently started to offer wholesale to other shops so it's been a busy few weeks. Exciting! So do ask your favourite quilt shops for them ;-) Or drop me an email if you have a shop, I'd be happy to hear from you. 

Have you tried apple core shapes? I'll keep you posted on how this turns out. Have a great week friends!

Cover Girl! Quilter's Desk Diary 2016 Edition!

$
0
0
Would you mind very much indulging me while I brag tell about my cover photo on the front of the new 2016 Quilter's Desk Diary! I was browsing Amazon one morning a few weeks ago and it popped up the 'you may also like' section, (I get caught with that all the time!) I thought, "I recognise that cushion!? Oh, it's MY cushion!". It's an image taken from the 50 Fat Quarter Makes book I contributed to last year, and the same publisher releases this desk diary each year. 

I'm so honoured to be the chosen photo for the cover, what a compliment! I can tell you, this will be kept in my 'scrapbook' of sorts and enjoyed for many years to come. 
It features lots of inspirational quilts and projects from a wide range of quilters on every page and a week-to-view diary page on the opposite side, with plenty of space for notes and important dates. 

It also has a full page shot of the brilliant 1718 Coverlet quilt, I just adore this. It's a reproduction made by members of the British Quilt Guild, in commemoration of the original quilt, which is the earliest known British patchwork quilt to have a date worked into the piece. It comes from the fascinating book 'The 1718 Coverlet', there's a Facebook group who are doing quilt-a-long alongside Susan Briscoe, the author. 

 It seems September must be my month? As it's my month in the Homespun 2015 calendar too! This is a project I worked on last year, or the year before? (Wow, has it been that long?) It looks quite pretty hanging on my kitchen pantry. I should probably dig up the shelf edging and display that in my kitchen too! How silly of me.


You can find copies of the 2016 Quilter's Desk Diary at Sew and Quilt now. 
Have a great weekend! Jessie

Tutorial // Apple Cores & English Paper Piecing: Part 1 / Basting

$
0
0
As I've been progressing with my English paper pieced, apple-core cushion, I thought I'd share a short guide on how I do my apple cores shapes (or Axe Heads, as they're sometimes known). I use the Sewline glue pen for curved shapes like apple cores and clamshells. Really I really cant recommend it enough for curves, I find its such an easier process than hand basting with a needle and thread. These days I glue baste most of my shapes for time-saving but I still thread baste larger straight-edged shapes. 

So first things first. Take your paper shape and cut your fabric roughly 3/8" larger than the paper template. For speed, cut a strip from your fabric the correct width you need for your chosen template, then sub-cut into smaller sections to match the length of your template. Stack the pieces together and trim around the shape with scissors to make multiple pieces. 

For regular straight-edged shapes I've suggested cutting your fabric pieces at least 1/4" larger as a minimum, but for curves you really need that extra as it makes the process a lot easier. If you go skimpy on the seam allowance, everything just gets a little bit fiddly. 

TIP: If possible, it's useful to use bias cut fabric. The bias cut has a stretch to it so you can manipulate corners and curves without bunching. 

Snip into the two inner curves of the fabric. This allows makes it easier to turn the fabric over the paper template without it bunching. Try not to cut too deep so you loose the seam allowance and the shapes become weak when sewn together. 

Now follow my lead and swipe your glue pen along the inner curve first

(Note: I am left-handed, so these photos will look backwards to a lot of you, I glue from left to right and turn/baste the shape in a anti-clockwise direction, if you're right-handed you will do the opposite, I think?)

Push the fabric firmly along the fist inner curve. 
You might find it useful to pin your paper template and fabric together to avoid jolting the position. 

Your first edge is now basted!

For the next side, swipe the glue pen and push the fabric allowance into the outer curved edge. Hold the glue pen just as you would a regular pen - there's no need to let go of it between sides. 


Outer curves are a little bit trickier than inner curves, which is why we start with that one first. Remember to push firmly so you have a nice smooth edge without bumps
Most importantly you want your corners as neat as possible, which makes sewing the shapes together much simpler. So really try and push and flatten the corners as you start and finish on each side. 

Work the next inner curve and then finish with the final outer curve. 


I use more glue than I would for straight-edge EPP shapes as you want them staying put, but still, you don't need tons of the stuff. If you need to re-shuffle the edge to get it lying smoother, do it quickly as it goes tacky quite fast. 


Here's your basted apple core! Those tails will be covered when we join the shapes together so you don't want to cut those tails off

I'll be back tomorrow for part 2 of the guide on how to join them together, as it's a photo heavy post. 

If you're looking for more tutorials and guides, you can find my complete EPP basics guide here. I'm using the 3" size apple cores for this tutorial (which is measured by the length of the shape) you can find them in my shop here.

Tutorial // Apple Cores & English Paper Piecing: Part 2 / Sewing

$
0
0
I'm back with part 2 of my guide for working with apple core shapes using the English paper piecing method. So today we're going to be joining our shapes together. It can look a little bit intimidating due to the curved nature of the shape, but it's really quite simple once you have a little practise. 

Gather your supplies; including your basted apple core shapes, needle, thread and scissors. I've recently switched to using Bottomline threads by Superior for EPP, and I can't recommend it enough. Take a length of thread (no longer than your arm span, to avoid getting tangled up), thread your needle and knot the end. 

This is where you join your shapes together. 

So place your two apple core pieces right sides together. Can you see where I've flipped these shapes? I'm going to sew right along those two opposing curved sides are, all we have to do is just adjust how we hold the pieces as we sew. 
Start with needle in one side and slide it through the opposite piece. 

Take the needle back through your starting place and repeat. I like to do this at least 2/3 times to start off and make things nice and secure. Bleugghh please ignore my non-manicured, 'crafty-workers' hands folks ;-) these were some up-close shots! 

Now with your pieces still held in the same position, begin whipstitching your shapes as you would do your regular straight-edge shapes (previous tutorial here). 

TIP: I do a lot more stitches per inch with curved shapes to ensure there are absolutely no gaps in my work and ensure correct alignment. 

Once you reach the point above; where the curves are separating in different directions. Stop. 

Re-position your shapes so they are lying at wide angle apart, almost lying flat - but not. 

TIP: My technique for a neat non-visable stitch is to place your (non-needle holding) middle finger underneath the section where you are sewing, use this as a balance to hold your pieces correctly. I've actually moved my thumb out of the way in the above photo so you can get a clear view of my stitch and my middle finger underneath holding the position - but I do like to have my thumb exactly where the needle pokes out on the opposite side. I do this to guide my stitches and be sure I'm 'eating' into the fabric evenly with each whipstitch. 

I find apple cores to be a very forgiving shape for not being visible from the front. Due to the shapes lying quite flat as opposed to  the normal way of placing two shapes right sides together and whipstitching tightly, here you are almost skimming the fabric so you aren't 'eating' into the fabric very deeply, which is generally the problem when stitches are visible from the front. 

Whipstitch all the way along the side, re-positioning as you need. Be sure to pull the thread firmly as you go to keep a tight seam.

Once you reach the end, take 2/3 anchor stitches (just as you did at the start). You'll want to go through the two folds here to make everything secure. This is why we paid extra attention to basting the corners of the apple cores; so we have nice crisp folds so the shapes are the same size and it matches up accurately. Knot your work to finish the seam. 

Your first pieces are joined! As a general rule, I sew apple cores in rows adding in one shape at a time. Once you have your row complete you will want to add more rows one by one. 

I like to remove the papers once I have all sides joined so I can move my work more freely. I lie my work on a flat surface and work the seams with a whipstitch just as I did when joining the individual apple core shapes together.


Once you come to an 'intersection', where four shapes meet together. Catch your needle through the first folds of the lower shapes, repeat 2/3 times. Then repeat for the other two folds of the upper apple core shapes. This will make everything really secure and very neat from the front.


Once you pass the 'intersection', pull the fabric tails or folds out of the way to keep everything neat as you continue whipstitching. 

This is how your work will look from the front. 


I hope my guide has helped you on your future apple core adventures! 

Helpful things to recap and remember:
* When basting your shapes, ensure you have nice tight, folded corners.
* Don't snip into the curved edge too deep, otherwise your fabric will weaken and tear.
* Use a neutral matching thread, if in doubt choose grey
* Remove paper templates once all sides are joined to allow more movement.
* Use anchor stitches at the start and end of each shape and 'intersections'

I'm using the 3" apple core templates for this tutorial. You can find them in my shop here.

If you have any questions, just jot them below and I'll reply in the comments so we can all share. Likewise, if anyone has any tips, do share! I love testing new ideas. Jessie

Daylight Company Desk and Sewing Lamps

$
0
0
It's officially Autumn now, and as the nights are drawing in (although as I type we seem to be having an un-seasonably warm end to September, which I very much welcome of course) we can expect the daylight hours to disappear quickly come late afternoon. So it's not always an ideal scenario for sewing for long hours into the night - and early hours, which I'm sometimes guilty of. So when Daylight contacted me to ask if I would like to review a few of their lights, I jumped at the chance. 


Daylight Company hale from the UK and are the market-leading brand of speciality lighting technology for the hobby industry across Europe. They specialise in 'daylight' lighting, bringing the natural light of the outdoors, indoors, using low heat/low energy bulbs that are ideal for close-up sewing work and perfect to use for long periods. 

They were kind enough to send me, not one, but three of their fantastic lights! I first hooked up the Task Lamp XL, as seen above, which sits proudly above my sewing desk. It has a 22" wide shade so it's a good size to spread the light around in a larger space. I honestly couldn't believe the difference it made when I first switched it on. It's fully adjustable vertically, horizontally and laterally to focus the light where you need it most. It absolutely booms light down onto my desk! It's dimmable for using at different times of the day and I find I often turn it down slightly in the evenings when its completely dark outside. During the daytime and especially at dusk, I have it on full. Funny how I probably use it in the opposite direction to general use?

You can really see the fabrics and colours you're using, there's no yellow tinge to everything like regular lights. To think I've gone from having a bulb hanging in the centre of the room (nope never got round to having a shade fitted, oops!) and a cheap clip-on lamp above my sewing machine, to all this! You can imagine my excitement when I go into my sewing room now and switch everything on! It's really like something out of the Starship Enterprise in there, goodness know what the neighbours think!

Over the weekend I had a major clean-out of the sewing room, I'm still not finished as it's all piled in the corner of our bedroom at the moment, plus I still need to go through my scrap bins, then I need to organise a little de-stash on Instagram (@messyjessedestash) if you're interested? So after my purge, I had a shimmy round and found space to fit another desk, covering my victorian fireplace I meticulously brought back to life when we moved in, but still practicalities call when you have a *tiny* house and a lot of fabric ;-) I digress. Back to the lamps! I then had the space to fit my other Daylight lamp, which is the super smart looking Ultra Bright Slimline LED Table Lamp. I've clamped it to the bookshelf with it angled above my my cutting desk. It has a long and flexible arm reach to bend where you need but without being floppy. The tube section where the light is, is twistable too! I thought that was quite nifty. If you don't have a shelf or didn't want to clamp it to the table you can purchase the base separately to use as a normal desk lamp. 


Back to my sewing desk I have the new Sewing Machine Lamp fitted. Like the other two lamps, it plugs into the mains, so you will have a wire loose at the back, which distracts me so I plan to use some self adhesive sticky dots (or similar) to trail it along the arm of my machine. It sticks onto your sewing machine using a sticky pad, which are very sticky I might add, so if you get one - make sure its in the right place first time! The lamp can then be slotted into place on the mount pad. Its fully removable, and comes with two sticky pads, so you can have another one fixed somewhere else and move the lamp whenever you need by slotting it into place. Easy, peasy. It has a flexible metal arm so you've got enough room to manoeuvre. It uses the same LED Naturalight as the desk lamps, but in a focussed area, which is ideal for use with a sewing machine. Though after testing it out for the last month I've found I can't use it in the evenings as its not dimmable and a touch too bright for me. I think perhaps, it could work better for me if I move it to the back of the machine and have it turned to the front so its not directly shining on my work at such close range? More testing required ;-)

Sewing, whether by machine or hand, can cause a great deal of eye strain so you really want to equip your area with an investment piece like the Daylight lamps. They will not only reduce eye strain over time but will also allow us to sew for longer intervals! Thats a win, win! 

I should point out, Daylight Company kindly sent me these lamps for free to review, however all views are my own. All the products featured are available to buy directly from their online store, with international shipping. I hope the reviews helped. Jessie

Coming Soon!

$
0
0
Are you like me and have ideas scratching around in your head or notebooks dotted about your house? I do, all the time! and they ALWAYS end up at the bottom of my to-do list never to see the light of day. Well, I couldn't hold this idea in any longer, and I'm so pleased!! Its a special quilt I've been plotting for *years* to release as a pattern, and since I often do projects for editorial titles I figured why not release this one myself?! Perhaps my English readers will think this design familiar? I drew my inspiration from Victorian floor tiles, which is a familiar scene in terrace and town houses up and down the country. 

I've used all my favourite fabrics, so it's 100% me, which feels amazing! And the best backing fabric ever, officially! Sometimes we just need some 'selfish sewing' don't we? 

The top is finished, prepped and backing fabric cut - now it's arrived with the long-arm quilter who can work some magic on it! While we wait for the finish next month I have a little helpful team of pattern testers, testing the measurements and dimensions for me ;-) then I'll be revealing the full finish at which point you can order the PDF or printed pattern at Sew and Quilt! Hooray! I'll be doing a few happy dances once this is all done! I love ticking things off my bucket list, can you tell?! 

Spell It With Moda Quilt: Finished

$
0
0
I've been getting quite slack on the finished quilts and blog sharing, so let me today update you on my FINISHED Spell It With Moda quilt. I started this quilt back in 2014 when the blog hop started, it was such a cool idea (good job, Moda!) and it perfectly tied in with my sister, Bianca being pregnant with her first baby ;-) so I had an excuse to pull out all my cute novelty 30s reproduction prints and primary colours for a happy baby quilt.  I think it took me about a month or so to make all the blocks and finish the top. They were so fun to do! Then of course I folded it up and put off the quilting 'for another day'… 

8 months later baby Benjamin was born, but alas the quilt wasn't ready. Doh. Festival Of Quilts prep, general life stuff got in the way, yada yada … it was always the bottom of the list. Then my patient (cough!) sister gently reminded me it was his birthday coming up in October, so perhaps I could finish it?? ;-) so I got to work last month and basted and quilted it. Finished the day before we travelled to London for his birthday, in typical last-minute-Jessie fashion. 

 It was the best thing gifting the quilt! Sooo special. They all loved it, phew! Aren't they a cute bunch too! 


I'm super sad not to have any better official finished photos though, I can only blame myself for finishing it in the late afternoon and not being able to take any decent photos. Hopefully these iPhone pictures will do! I used a really nice backing fabric as well, which of course I forgot to photograph. It has a really fun scrappy binding which works well with the low-volume and Kona Snow background.

Pattern: Spell It With Fabric by Moda (free)
Quilted: Jessie Fincham
Fabric: 1930s novelty reproductions, Ducks In A Row by American Jane, Kona Snow


Glorious Gingham Quilt Finish

$
0
0

There aren't many times I would share a quilt finish with the backing as the first photo, but on this occasion its a necessity! Favourite. Quilt. Backing. Ever. It really makes the quilt. With an all solid pieced top, it could look quite plain and simple, but the backing really makes it all pop! In a big way!  

The front is pretty nice too ;-) The quilt was a project I did for Love Patchwork & Quilting magazine earlier this year, issue #23. I had a major thing for gingham at the time (and still do!) so we collaborated on an idea and I think it turned out quite well. It makes the perfect picnic quilt and I'm excited to test that theory out next summer since I didn't have a single beach day this year, boo! Yep, lots of picnics in the park and summer beach days I'm planning next year. 


It uses simple strip piecing so once you've got your fabrics cut and organised you'll speed through construction. I have quilt kits available at Sew and Quilt, which includes the fabrics for the quilt top only, the pattern (at this time) is only available with LP&Q magazine. I managed to hunt down back issues here, if you're interested in making one. As well, I will be releasing the pattern myself next year once I'm able to do so. I'm planning another version in printed fabrics too. 


The quilting is a little wiggly for my liking, but hey, thats life! I quilted in 'straight' lines with 1/2" spacing on the two end borders and then through the centre of each pieced row, and then again 1/4" either side. I wish now I'd gone with 1/2" all over, but I know for next time now ;-) I carried on the same fabric for the binding for a clean finish. It gives a nice contrast against the white borders on the front too. 


I also made a couple of matching cushions too! There's a peach coloured one to match alongside the yellow below. I'm selling the cushions, so if you're interested in buying them drop me an email :-) 


Always fun to see my name in print! Thank you again LP&Q! The girls over there are the best. Look out for their new sister magazine; Today's Quilter too, its fab! 


Pattern: Glorious Gingham by Jessie Fincham (pattern featured in LP&Q #23)
Quilted: Jessie Fincham
Size: 54" square
Fabric: Kona Solids by Robert Kaufman Fabrics, backing and binding; vintage sheet

I've also FINALLY found a place where I can take full photo's of my quilts outside so I'm extremely happy today! Its the little things eh! ;-) Have a great Sunday! Jessie

Lori Holt's Cozy Cottage Calendar: Blog Tour!

$
0
0
Today I'm kicking off the Lori Holt tour for her newest release; the Cozy Cottage 2016 Calendar! Lori, of Bee In My Bonnet puts her unique quilty spin on this fun calendar which you can use and enjoy all year! As well, you have the pattern to make the mini quilt on the front cover...


… and these cute pillows! Don't you just L-O-V-E that flag border around the cottage block!? A perfect finish. 
For my cozy cottage block, I decided on a Christmassy theme going all red, which I figured would be really sweet as a Christmassy pillow, or mini quilt for the upcoming festive season (not that long to go!). I made the larger 8" size. Lori has included pattern instructions for a 4" block and an 8" block. Whatever I decide to finish it into, I know I'll be using the border like Lori, for sure!


If you're a fan of the delightful Lori Holt Farm Girl style, you'l love this. Quilty, country styled photos are featured on every page, so each month will be a treat to turn over. A big thank you Fat Quarter Shop for my copy, I look forward to getting organised in 2016! You can find it available to buy from them here. I also have copies available in my Sew & Quilt shop too, for those who want to order from the UK/EU. 

Have a great week friends! Its my birthday today, so I'm hoping for an afternoon of sewing, fingers crossed! Jessie, xo

Pssst… In other Lori Holt news new brand new Bloom Sew Simple templates have just been released and are now available at Sew and Quilt! Lori will be using these in her new QAL starting January to make the 'Bloom' quilt, which will be offered as a free pattern on the Riley Blake website. < Order your 'Bloom' Templates here>


Quick Update

$
0
0
My new quilt pattern will be ready for release soon. I'm tweaking the pattern here and there and working on some last minute edits. The newly named Penny Tiles quilt has arrived back from the long arm quilter with a lovely Baptist Fan design, I'm really happy with the outcome so once I'm done with the binding I'll share the full reveal! Exciting!

I'll also be planning some quilt kits hopefully! A loooovely delivery of Liberty Tana Lawns arrived this week for Sew and Quilt, so I've been busy petting and admiring for the last few days...


As well I don't think I could write a blog post today without mentioning the terrible events that have happened in Paris last night. So, so devastating. My heart goes out to everyone in France. This is a photo from my trip to Nantes this year, my first time visiting the country. I've never been to Paris, but its a place I've always wanted to visit and hope to someday. 
Have a peaceful weekend friends.

1930s Farmer's Wife QAL - #23 Charlotte / Rotary Cutting Tips

$
0
0

I'd completely forgotten how much I loved making these little Farmer's Wife blocks! It was such a pleasure rummaging through my scrap bins and stash auditioning different fabrics for each one. Thank you Kerry for inviting me this week on the 1930s Farmer's Wife Quilt Along, I don't think I would have got round to making one if I didn't have a special post to write. 

The big stack of blocks above are all from my original Farmer's Wife Sampler Quilt, which I happen to make in 1930s reproduction fabric, so it's completely fitting for today's QAL blog post - so they made an appearance ;-) I started making these quite a few years ago but still haven't got to the finish line with it, I thoroughly enjoy making them (which can be extremely labour intensive), so I'm in no hurry! I'm all about the sloooow sewing…

I really love the new addition of the miniature diagram thats included on the pattern page of each block. How fun. I know this is used for foundation paper piecing directions, but I thought it might be a nice memento for a quilt journal with some watercolour paints perhaps as well? 

Says the girl that hasn't even finished all the blocks from the first quilt? I know, I know. 


I digress, back to the #23 Charlotte block, which you can find on page 182 of the book. I rotary cut and machine piece, as I have done with all my FWQ blocks. There are rotary cutting templates provided, in addition to the foundation paper pieced ones. Just print them out on regular paper (they have a 1inch size guide on the page so you know you're printing out at the correct size, which of course I didn't on first time, oops. I succeeded on second attempt by selecting the US Letter page size in my printer - you might want to also use something like 'do not scale' etc). 


Most often I will dig through my stash as they are such tiny pieces you really don't need much. If I use yardage I'll rough cut a strip larger than the template and rough cut a larger shape than the template. I will often fold the strip to double over, depending on how many pieces are required for that fabric/shape. 


I usually stack about 2-4 pieces (depending on how sharp my rotary blade is) and trim off the excess, lining up with the edge of the template. Turn and cut, turn and cut, being careful not to shift too much. I use a mini rotary cutting mat that spins, not sure why it didn't make the picture? 


Once you're all prepped you're ready to go. Chain piecing makes life much easier here. Once I'm done with the chain I'll bring it straight over to my iron for pressing (without too much handling) and trim the threads while at the iron station to save time going back and forth. 


And here she is all finished! I went for a different colour combo than the book version. I used Corn Yellow Kona solid, which is a really bold yellow that packs a punch, alongside an old Mother's Melodies print I used to sell a few years back in the shop. The opposite side is my favourite green, Aloe Kona solid and a matching Pretty Posies print by Darlene Zimmerman. I have a popular Kona bundle I put together for Sew and Quilt, which is a complete FQ bundle of all 22 official 1930's Kona solids. They are perfect for this QAL!


Of course I couldn't leave without sharing some 1930's repro eye candy from Sew and Quilt with you! *plug, plug, plug*. On the left is the delightful Pretty Posies FQ bundle, it's subtle and sweet without bring over the top, plus it's 10% off ;-) On the right is a special Farmer's Wife FQ bundle I put together for the release of Kerry's QAL. What a great bunch hey?!

If you fancy joining in VeryKerryBerry's QAL, you can find all the details here. Kerry has lots of helpful tips and information on making the blocks using the foundation paper pieced method and other bloggers have been hosting to share their tips on the different methods of construction also. There is also a very useful errata page thats kept up to date so do take a look. (I reported no problems with my block).

Thanks for stopping by and have a great week! 

Great Granny Twist with Lori Holt - Blog Hop

$
0
0
The 'Granny-Square' quilt block is absolutely one of my all-time favourite blocks, and today I'm sharing a super fun project using Lori Holt's Great Granny Mini block, with a twist! Quite literally in fact … 


I'm putting them on point! By adding some setting triangles and corner setting triangles the finished blocks are ready to turn into a pillow! I'll be showing you how to set any size block on point with the quilty maths. 

This is part of the Great Granny Twist Blog Hop, where bloggers have been invited to put a spin on a project from Lori Holts book. You can read all the details on the rest of the blog tour with Fat Quarter Shop here and find out what the rest of the bloggers have come up with. Such a fun idea, thanks FQS! As well Kimberly, from FQS has put together this video tutorial of her twist on the Granny Square block using appliqué circles. 


I pulled some crazy bright fabrics from my stash for this special project! The blue floral print used in the triangles is a vintage fabric I've been hoarding for *just* the right moment and I think it makes for quite a striking finish! I had lots of fun choosing the fabrics for the blocks for an eclectic mix of modern and old - I even fussy-cut the centre block with some vintage stichery taken from an embroidered tablecloth. 

I hand-quilted using Aurifil 40WT thread using the Fat Quarter Shop Finishing Set. It worked a treat! I'm so pleased I took the time to hand-quilt. 


First, make up 5 Great Granny Mini blocks, according to Lori's instructions featured in the book. Once you have your finished 6-1/2" blocks we need the following calculations to determine what size to cut our pieces. Adjust the finished block size to make any quilt block on point. 

Corner Setting Triangles

6.5" (finished block size) / 1.414 + 0.875 = cut size of square 
Cut square diagonally to make 2 finished (Half Square) corner setting triangles.


Side Setting Triangles


6.5" (finished size of block) x 1.414 + 1.25 = cut size of square
Cut square diagonally twice, to make 4 finished (Quarter Square) side setting triangles. 

Assemble your pillow top as follows. (Navy squares are your finished Granny Square blocks.) Piece together in rows, then add the corner setting triangles to the each corner. 


These measurements finish slightly oversized triangles so you have lots of wiggle room to square up your quilt top. I have a tutorial from a few years ago on how to finish your pillow with an envelope closure


Granny Square 'mini' block by Lori Holt, adapted with permission by Jessie Fincham.
You can purchase the book from Fat Quarter Shop here, and if you're in the UK you can purchase the book from me at Sew and Quilt

Winter Wishes Christmas Table Topper Tutorial

$
0
0
It's my stop on the Riley Blake Stitch 'n Kitchen Christmas Blog Tour today, so I'm sharing my Winter Wishes TableTopper pattern which you can make in no time for your festive table this year. Learn how to make my *delicious* recipe for authentic Cornish Fairings biscuits as well, also known as the best ginger biscuits ever! ;-)


The Recipe:
Title: Winter Wishes Tabletopper
"Making" Time: One evening
Notes:  Please read through all instructions carefully. Seams are 1/4" unless otherwise stated. RST means right sides together. Press seams open unless otherwise directed. 

Ingredients
White fabric 1FQ
Red fabric (4) Fat Eighths
Green fabric 10" x 10" square
Binding 1FQ
Backing 1FQ

Instructions: 
Cut the following;
* From each red 1/8, cut (1) 2-7/8" strip. Sub-cut into (5) 2-2/8" squares, you need (20) squares total. Cut (1) 4-1/2" square from each red fabric, you need (4) total. 
* From the green fabric sub cut your 10" square into (4) 2-1/2" squares. 
*From the white fabric cut (1) 2-1/2" strip, sub-cut into (8) 2-1/2" squares. Cut (4) 2-7/8" strips, sub-cut into (20) 2-7/8" squares. 


1. Draw a diagonal line through from one corner to the opposite corner of each of the 2-7/8" white squares. Place a white square with corresponding red square RST together, sew 1/4" from the each side from the drawn line. Cut along the drawn line. Open and press seams to the dark side. You now have two complete half square triangle (HST) units. 
Repeat steps for remaining squares to make 36 HST units. 


2. Assemble your block as follows. Your block should measure 6-1/2" square.


3. Assemble your blocks in two rows. Join rows together. Press all seams open. 

4. Cut an 18" square from backing fabric and batting. Make a quilt 'sandwich' with your quilt top, batting and backing fabric. Baste. Quilt as desired. I chose to machine quilt at 1" intervals diagonally through the centre. 

4. Cut (2) 2-1/2" x WOF strips for binding. Piece together. Press in half length lengthwise (wrong-sides together) to create your binding. Sew to quilt top, miter corners and fold and hand-sew to the backside to finish. 


I hope you've all been enjoying the Riley Blake 'Stitch'n Kitchen' blog tour. Hop over to the main page for all the details with lots more sewing ideas to make and Christmas recipes to enjoy. Thanks for stopping by, Jessie


The Recipe:
Title: Cornish Fairings Biscuits
"Making" Time: 30mins

Ingredients
100g Butter
225g Plain Flour
2tsp Baking Powder
1tsp Ground Ginger
2tsp Mixed Spice
100g Caster Sugar
4 tsp Golden Syrup

Instructions: 
Heat oven to 200C/180C fan/gas 6. 
Lightly grease 2 large baking sheets. Put the flour, ¼ tsp salt, baking powder, bicarb and spices in a food processor. Add the diced butter and mix until the mixture resembles breadcrumbs. Tip into a bowl and stir in the sugar. 
  1. Gently warm the golden syrup in a pan, add to the mixture and stir to form a dough. Roll the dough into 16 medium-sized balls, and spread them on the greased baking sheets at least 2cm apart. Bake for 8-12 mins until golden. 
    Cool on the trays before transferring to a wire rack.

    Voila! Now enjoy that lovely Christmassy mixed spice taste! I eat them all year round too! (Thanks mum!) Hope you enjoy them too, Jessie

1930s Farmer's Wife QAL - #47 Joy

$
0
0


Welcome to another stop on the Farmer's Wife 1930's Sampler Quilt-Along! I can't quite believe the time has come around so quick for my next instalment, so much so I was delayed in sending out this post today! Though it turns out I had already made this block yonks ago in prep for the blog-tour I'd just completely forgotten!? Not sure how I forgotten when it turned out to be one of my favourite FWQ blocks so far. I copied the colours used in the book almost identically, as I loved it so much. I'm definitely going to use this dark green, lemon yellow and red colour-scheme together again, it give such a strong effect. 

As with all my blocks, I have machine pieced and rotary-cut using the rotary cutting templates provided with the CD. I'm not as clued up as Kerry for the foundation paper piecing method unfortunately. You can find Kerry's version of this block on her blog today.  If you're a machine piecer like me, I posted some tips on a previous blog post here. I hope this helps. Looking forward to making some more of these soon! 

You can link up your blocks on social media with the hashtag #fw1930sqal, and with this block in particular; #joyblock #fw47joy
Fabrics: Kona Solid 'Leaf' and 'Red' from the 1930s Fat Quarter Bundle at Sew and Quilt.

Petite Christmas Stars Mini Quilt - Free Pattern!

$
0
0


HELLOOOOOO! Hello blog friends! It's been a loong time hasn't it? Much too long I think. 

I think many of you will know my business has taken centre stage the last couple of years so it hasn't left me with much spare time for blogging, but more on that another time ;-) today I wanted to share with you this little mini quilt I made recently. I had a creative itch for stars, red, pink and some sort of christmas theme and this was my result! 

Free pattern as follows;

Cutting
For the star blocks:
(6) 3-1/4" cream squares
(24) 1-1/2" cream squares
(12) 1-7/8" red squares 
(12) 1-7/8" pink squares 
(3) 2-1/2" red square
(3) 2-1/2" pink square

For the sashing, borders and cornerstones:
(4) 1-1/2" x 4-1/2" sashing strips 
(1) 1-1/2" x 14-1/2" sashing strips (please adjust this length if required)
(2) 3" x 9-1/2" border strips (please adjust this length if required)
(2) 3" x 14-1/2" border strips (please adjust this length if required)
(4) 3" square cornerstones 

Block Assembly
For each star block you will need the following: 
(1) 3-1/4" cream square
(4) 1-1/2" cream squares
(4) 1-7/8" coloured squares (either pink or red)
(1) 2-1/2" coloured square (either pink or red)

For each star block you will need 4 flying geese units. Please follow my diagrams below for assembly - this is the no waste method! 

1. You need (1) 3-1/4" cream square and (4) 1-7/8" coloured squares to make 4 flying geese units.
2. Sew 2 coloured squares to the white square. Draw a line diagonally through the centre. Sew 1/4" from the drawn line on each side. 
3. Cut on the centre drawn line. 
4. Press the coloured squares flat. Lay another 1-7/8" coloured square on top and draw a line through the middle and sew 1/4" either side as before. Repeat step with other unit. 
5. Cut through the centre on the drawn line. Repeat step with other unit. 
6. Press seams flat - you have made (4) flying geese units!


Once you have made your (4) flying geese units assemble your block as follows. 


Square up your star block to finish at 4-1/2" square. Make 6 star blocks total. 

Quilt Assembly
Assemble your quilt top following the diagrams below. 
1. Sew the short sashing strips to the star blocks alternating between sashing and block to make a unit of 3 star blocks. Make two units. Sew the longer sashing strip inbetween the two units. 
2. Measure your quilt top and adjust the border cutting measurements above if required. Sew the shorter border pieces to the top and bottom of the quilt top. Sew the cornerstones to the ends of the longer border pieces. Sew longer border units to sides of quilt top. 


Finishing
1. Press your quilt top. 
2. Cut a backing fabric and batting 2" larger all around, than your quilt top. 
3. Make a quilt sandwich with your backing facing down, your batting and quilt top facing upwards. Quilt layers together following your preferred method. I hand-quilted my quilt using Aurifil 28wt in Light Beige and used a Tulip Hiroshima, Quilting needle size 8
3. Cut (2) 2-1/2" x WOF strips for your binding. Join strips together to form one continuous strip. Sew to quilt top following our favourite method.


Size: mini quilt measures approximately 19" x 14"

Fabrics used: 
Various fabrics for star blocks and borders etc all available from Sew and Quilt
Sashing fabric, border fabric, binding fabric

Now don't say I don't treat ya' ;-) happy sewing friends, it's so lovely to have you back again. Until my next post, feel free to follow me on Instagram @messyjesse1 and tag me with your #petitechristmasstarsquilt progress and finished articles! I'd love to see them. Comment below if you enjoyed this post and fancy making one! I promise not to leave it so long next time! ~ Jessie

Using Acrylic Cutting Templates for Fussy-Cutting

$
0
0

'Fussy-cutting' it's a funny term, but quite simply; it is cutting and using a particular motif or repeating element of a fabric print intentionally. When used with the precision of English Paper Piecing, it's a perfect fit and you can understand why it's so incredibly popular - and addictive!

Using acrylic cutting templates for English Paper Piecing in general is a life-saver and produces accurately cut fabric pieces ready to baste to your paper templates. People are often confused by them and think they use them in place of paper templates, but they are designed to be used alongside paper templates as they have the seam allowance added around the edge.

All of our Sew & Quilt acrylic templates come with a 3/8" seam allowance. Why you ask? 1/4" is the minimum you need for turning over, 3/8" is 1/8" larger so it gives you a little more wiggle-room - which you will come to love!
*I should note, our teeny acrylics - under 1/2" have a regular 1/4" seam allowance - well, they are tiny after all!

Supplies:
* Quilting cotton, which features a repeating pattern or motif
* Sew & Quilt acrylic cutting template
* Pen or water soluble pen
* Medium sized scissors or 28mm rotary cutter
* Paper Pieces (of matching size)
* Sewline Glue Pen


1. First gather your fabric and find your perfect motif! A pretty drawing such as this, stripes, repeating patterns that you can spin and and tilt all work wonderfully for creating a kaleidascope, fussy-cut effect.


2. Use a pen or pencil to draw around the acrylic template. More often than not I will use a regular Biro (call the quilt police!) as I find it easiest to see and I'm cutting on the drawn line so I don't need to worry about spoiling the fabric. You can also use a water-soluble pen, which I use sometimes too. 


3. Cut out your shape. I personally find scissors give me more accuracy, but you can also use a small rotary cutter too if that feels more comfortable.


4. Dab a dot of glue on the middle of the paper template, position the fabric shape on top centrally (the glue will hold it's place to stop it moving). Baste the fabric to the paper template, using your preferred method. 


5. Voila! Finished. Now see if you can stop yourself next time you look at a fabric in your stash, soon it will be swiss-cheese!


If you're not fussy-cutting but still want to use an acrylic template, a speedy tip would be to rotary cut strips from your fabric, subcut them into the smaller squares or rectangles and then use the acrylic templates to trim off the edges to follow your shape.

At Sew & Quilt we offer them in set sizes that match your paper templates - no need to add the seam allowances, we do that for you to make it easy! So if you're working with 1-1/4" Honeycomb paper pieces, you will need a 1-1/4" Honeycomb acrylic template. Easy, peasy. 

Block of the Month Club Reminiscing

$
0
0


Hello friends! I thought it was high-time I shared some information here about the Block of the Month clubs I run at Sew & Quilt, which unavoidably led me to stop blogging for so - many - years! I know, I'm sorry for my dissapearance over here. But who would have thought it would have taken off like it did!?


In short our Block of the Month clubs run like a monthly subscription service where you will receive all the supplies to make yourself a beautiful quilt top. We come up with the pattern, organise the design and plan out how we will send you a delightful little package once a month with all the fabrics, English Paper Pieces (if it's an EPP one) and instruction sheet with diagrams, cutting instructions on how to sub-cut the pre-cut strips into manageable pieces and swatches to match up with your kit. You will then get to work on making those blocks or sections of the quilt for the month.

For the most part we start our clubs in January and finish in December. Fabrics are chosen by me and we package your kits like a beautiful gift every month. The price varies for the particular quilt we are making, some quilts use suprisingly more fabric than others and we really try to balance it out as cost effective as possible for customers.

We have a private Facebook group for our BOM club members to share photos, spur motivation and offer help and advice to each other. I send out newsletters to BOM club members via email too whenever we have useful or important information to share.


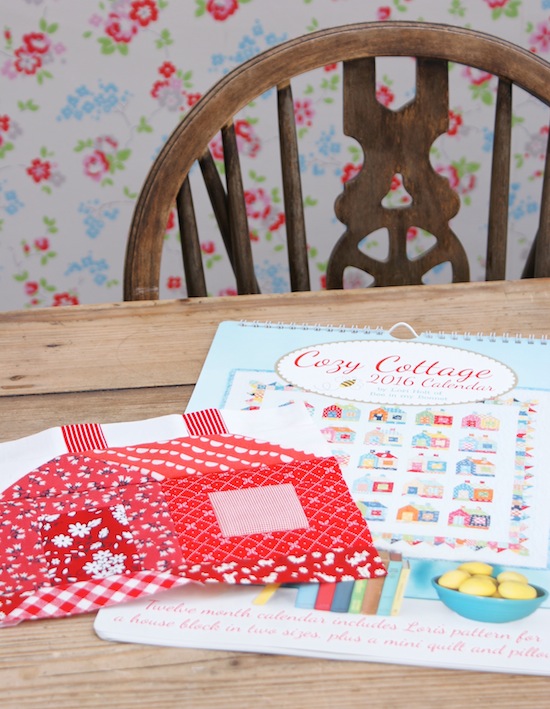
January 2016 | Our first Patchwork of the Crosses kits!

Way back in 2015 ... I had a leeeetle idea that I wanted to make the Patchwork of the Crosses quilt pattern by Lucy Boston, she used the most beautiful fabric combinations with Liberty fabrics and made entirely by my favourite technique, English paper piecing! I thought hey, it would be such a fun idea to make this with quilters across the globe and send out the paper pieces and the fabrics to them in a little kit so we could all make the same one. Customers and blog followers often commented how they liked my fabric combinations so I thought yep, I could choose the fabrics for them and they can get straight on with the making part. I know a lot of quilters say they struggle putting fabrics together, but it's my favourite so I knew I could help out.

January 2016 | Awful, tired photo of me but feeling proud of the first dispatch!
October 2017 | Kits outside our new premises.

Soon after the lightbulb moment I contacted Liberty to setup an account with them, they accepted and before I knew it bolts of divine Liberty fabrics were arriving at my door! I had just moved into my first business premises (scary times!) and I dropped a note in a shop newsletter asking if anyone was interested in a club next year? I had some confidence people would like the idea; it was a new spin on an old concept of a quilt-a-long run by traditional quilt shops and quilting bee's. But it would be a new in that it was paper pieced (to my knowledge there were no other EPP BOM clubs at this time and only did I start to see them with fabrics etc. in 2018) and would be packaged like a beautiful gift. Everything would be included for customers to get started straight away. It was something I would like as a quilter, so surely others would be interested?


July 2016 | Patchwork of the Crosses, moved to smaller boxes!

Low and behold, people said yes! I remember having about 20 customers emailing me; "yes, please!". OK, wow. I thought right this has to happen now, and now I have to get this organised. "Robin!", "How much will this cost, and how much fabric will I need each month?"... Of course by this point I'd already skipped over all that and was busy thinking about how I was going to present them, what boxes I was going to use and keeping up with general day-to-day shop work. I have to give full credit for the beautiful presentation of the fabrics to my colleague at the time; India, she was my part-time helper and folded and packed the fabrics in such a brilliant way, it's not changed since that first month back in January 2016! To have the amount of different fabrics we include each month look presentable in a teeny, tiny bag is quite a delicate dance we play each month, but we always figure it out with some practice runs so they always look lovely. Some clubs are certainly easier than others though!


June 2018 | Neatly packed POTC fabric kits, in our signature style. 

Robin is a complete number bod, and was always excellent at helping me calculate yardage requirements and number of pieces etc for my quilting projects at home, so he really was essential to getting the quilt block of the month club setup and running; working out how best to cut fabric efficiently, how many metres I needed for X number of BOM Club kits and the number of customers we should be aiming for the year to make it profitable and to make it all worth while, as there's alot of admin and work that goes on behind the scenes to make it happen.


March 2019 | New stickers for our BOM boxes!

It was a steeeeep learning curve that first year, just thinking of a database and how to record everything was brand new to me. I remember having all these names and addresses of everyone and thinking, "How on earth am I going to get these on the boxes?" Well I will tell you, I sat on the phone for about half and hour with a very helpful customer service agent from Dymo and she helped me get the info into an address book so I could reprint them every month. I didn't have a business account with Royal Mail setup at that time so my old boss from my previous job would swing by and drive me to the PO, or my mum would come by in her pickup truck (just to note we didn't have that many packages to warrant a truck, she just had a truck at the time, haha) and drop me off and go through the torture that was the post-office...

At that time Robin was working full-time in his regular finance job and it was just me with India helping part-time. In the evenings after work he would come and help me cut fabrics for the BOM club each month. Those first few months of 2016 are such a blur now, I can't remember much at all. I think soon after, India left to go travelling and it was just me, then Robin joined me full-time, which is pretty much where we are now in terms of staff, with my mum coming in to fold, make boxes and pack kits each month. A few months later we were moving units a couple of doors down, into a larger purpose-built space for us, (more scary leaps of faith!) investing in machinery to cut the paper pieces ourselves in-house (even more scary leaps of faith!). As we do to this day, and sending Robin on an Adobe course to learn a graphic program to help me get my ideas out of my head and scrap paper and into a format we could actually use.

So we were cutting all the fabrics, paper pieces, packing the paper pieces, folding fabrics and boxing kits by ourselves, all very labour-intensive which is probably why I can't remember much! Ha. Robin could finally appreciate where all those hours I spent non-stop working on the business ;-)


April 2016 | Robin joining Sew & Quilt full-time! 

The following year we released a new EPP Block of the Month club; Wagon Wheels, a new EPP design I worked on as an exclusive for our club. We re-released Patchwork of the Crosses EPP Block of the Month because there seemed no shortage of customers wanting to join us again once they had started seeing them online and friends from quilt groups doing it too. Fast forward a few years we still offer Patchwork of the Crosses as a monthly club due to its popularity. I love to come up with the kits, choosing different block formations and fabric combinations. Every year it changes with our new fabrics that come in, but stays true to our Sew & Quilt style.

That year I really stepped up the packaging game and had our first Sew and Quilt BOM boxes made and shipped over. Wow. I loved them, after designing them and thinking about dimensions both interior and exterior I ordered them, only to panic and realise the interior measurements I had planned only JUST fitted through the Royal Mail 'Large Letter' size slot as it was a couple of mm thicker an anticipated... with the mailing bag as well it wasn't ideal but hey, you learn as you go!

We were still using the Royal Mail Drop & Go system at the post office, but luckily now Robin was here we had a car to get to the PO! Our fantastic local post office closed that year and moved into a shop, which for us was a nightmare. Soon they couldn't handle the volume due to their own staff cuts and were sending them out the next day after dropping them off, not ideal. So I setup a RM account and we started doing the packages ourselves online, a few months later that system was obselete and we had to get used to a new RM system. I remember using it on the first day and crying because I did everything wrong and it took forever, lol maybe it was a long day that day!? A happy update, I do Royal Mail everyday for our online orders and all is well now ;-)


June 2018 | Blooming Blossom Quilt fabric kits ready to be packed.

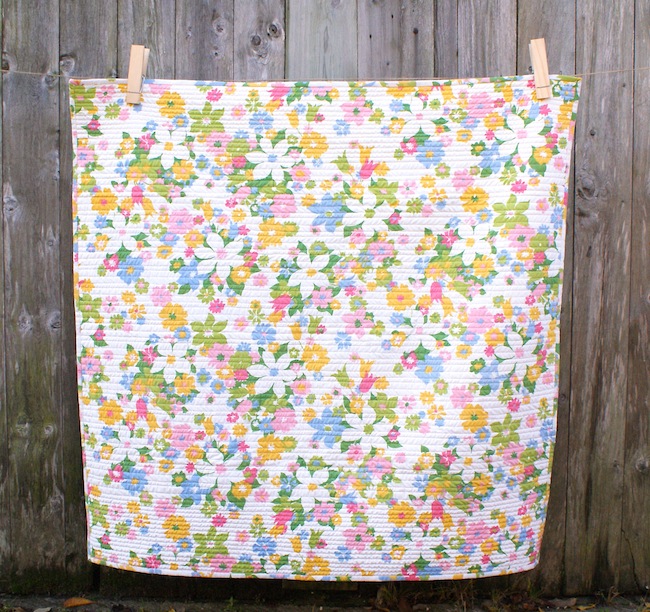
In 2018 we released Blooming Blossoms, which our customers really loved! Many have asked us to do it again, but I always like to change up the extra EPP club we do alongside POTC, to make it interesting - and so I don't go mad! We are planning on releasing Blooming Blossoms as a pattern and kit this year so be sure to signup to our shop newsletter if you would like details of first release dates.


Blooming Blossoms Quilt with navy background option.

We also ran our first non-paper pieced Block of the Month club. I fell in love with Norma Whaley's 'Remember Me' quilt from the cover of her My Quilting Legacy Quiltmania book and knew I had to make it - and I did finish it! Yipeee.

We also reordered our BOM boxes that year, changed up the design and made them smaller so they would fit easily through the 'Large Letter' slot. I ordered custom tissue-paper and really went to town on improving the look and Robin started drawing all the monthly block diagrams on the computer instead of my versions on EQ7 which I could never figure out how to use!


Our special BOM bag we gift to our customers during the course of a BOM club!

In 2019 I came up with another new EPP BOM club; Row by Row. I started to really feel the pressure of creating something new and different when there now seemed to be a market flooded with ideas and monthly clubs non-stop via Instagram. In reality I know I just have to block that noise out and concentrate on our very loyal customer base and what I truly love to do as that seems to work for us :-) So I had a hard time nailing down an idea with the big doubt cloud over my head constantly, which led me to think "OK, we'll do a bit of everything this year!". I started drafting our row-along quilt, which included a good mix of all the different EPP block ideas I had been plotting and not made a decision on. After a couple of days working on it I had it all drawn out and made some mocked-up blocks. Robin had drawn it out on the computer, at which point I can cut and re-size things to make it harmonise and work efficiently as a monthly club. I then have the fun part of colouring it in! which takes some time to really think about the colours and how it's all going to work together. I then cut and edit again if needs be.

There are some beautiful versions of the Row By Row quilt by our customers on Instagram and I think it might just be my favourite one yet. This will be another pattern and quilt kit we will release later this year, so if you missed out - fear not!


November 2018 | Testing one of the Row by Row blocks for size.

I tried my hand at wool appliqué for the first time having admired it from afar for a long time and we organised a new wool appliqué block of the month club to make Deidre Bond Abel's York Plains quilt from her book Hat Creek Quilts. What initially turned from being a little more complicated due to working with a new material, turned into a very difficult situation, fast. The wool we originally ordered was cancelled at the last minute (literally the day before we had planned to launch the club no less!) then scrambling to find other wool sources to no avail, some of our original wool we ordered was then available at the last minute again. Some were still cancelled so we used other sources and dyed and felted ourselves. It's the most beautiful quilt and thankfully was very well received by our customers, however there was a lot of pressure on Robin to cut the wool efficiently and not leave any to waste due to the high cost and us making it affordable for customers, while making sure we absolutely had every single piece included in each persons kit. Working late into the night felting and stirring buckets for hours on end in our kitchen to dye it, ha! Yes we won't be doing that one again in a hurry...

We planned to release a new appliqué BOM club in last month but I was ill over the Christmas holiday when I had time to finish up the design. For this years club I'd come up with my own design, which I'm so excited to share and I have all drawn out to scale on paper, but haven't got those block drawings on the computer for printing purposes yet! Time is not on my side.


For 2020 we have an exciting EPP Block of the Month club: Spinning Stars 2020! This one actually came to me very quickly, and I made a real effort to pursue it and not second guess myself because I really do love the design. This one is using entirely English Paper Piecing and creates really interesting blocks just mixing up the quantities and colours of blocks. I'm happy to report I'm on schedule for this month! I hope to share some more updates on my progress here during the year, and hoping I have more time for sewing in the later part of this year ;-) as we have some big plans ahead.


November 2019 | Spinning Stars mockup blocks. 

I'm pleased to report as well, we have moved to even smaller boxes! A similar size as the original A5 brown boxes we had from our first year! See the photo below for reference the box on top is the size we are using now, underneath is the previous version.


I hope you enjoyed this long trip down memory lane? I'm feeling nostalgic at the moment so initially this blog post was intended as an informational on our clubs, but I thought it would be fun to look back and see how far we've come with the clubs.

It really is the best-post-day of the month! And some of our customers have taken to calling them their "pink box days", which I love and use myself now too. We hope you can join us for one of Block of the Month club at Sew and Quilt. We have spaces available on Patchwork of the Crosses and Spinning Stars, if you sign up now rest assured you will not miss any of the previous kits.

How Do I Join A BOM Club?
1. All you need to do is sign up via our website, click on the corresponding product page for the Block of the Month club you want to do. Checkout for the £1 signup fee. Yep, that is correct.

We will then handle everything else. All you need to do is sit back and wait for your kits to arrive!

Meanwhile we will debit your account with for the balance, which is the number of kits that are backdated + postage (international customers your balance will be a combined postage rate = 1 regular postage rate + £3.50 per additional kit). We will then pack them all up neatly and dispatch your lovely kits to you asap. You will be added to our database and going forward you will receive the kits in the usual timeframe as our other customers.

Churn Dash Quilt Block Pattern

$
0
0


Hello readers! The Churn Dash quilt block is such a simple but effective block. Always a classic. I have two construction methods to share with you today, regular machine-pieced or using English Paper Pieces, to keep all both camps happy ;-)

My inspiration came from some antique Churn Dash blocks I'd found on Etsy, they have a subtle pink gingham background with handsome 1800s reproduction prints. I'm just gathering ideas at the moment to give my sewing room a little spruce up so I thought some antique quilt blocks framed on the wall would be ideal decor. Then I realised ... wait I'm a quilter, I should probably make these myself?! And they sold, so I really had no choice.


The new Full Circle quilting fabric we have in stock at Sew & Quilt was just the ticket, couple that with the Pink Carolina Gingham I was in business! 

These blocks finish at 6-1/2" square so they would work well in a mini quilt, or adding as a border to a medallion quilt perhaps, or a whole quilt of these!

For the machine-pieced method, please follow the below steps;

Cutting
For each Churn Dash block you will need to cut the following;

From background fabric (Pink)
(2) 4" squares
(5) 1-3/4" squares

From coloured fabric (Green)
(2) 4" squares
(4) 1-3/4" squares


Block Assembly
1. Place a 4" pink and green square right sides together. 
2. Draw a line from corner to corner along the diagonal.


3. Sew a 1/4" straight line from either side of the marked line. 
4. Rotary cut along the marked line. 


5. Press seams open. You will now have 4 HST units. 
6. Trim to 3" square.


7. Sew a 1-3/4" pink and green square together. Make 4 units total.
8. Press seams open. 


9. Your units are ready to sew together!


10. Follow the placement below for sewing each of the three rows. 
11. Sew the three rows together to complete the block. Press seams open. 


For the English Paper Pieced method, please follow the below steps;


English Paper Pieces
2-1/2" Half Square Triangle paper pieces | matching acrylic template
1-1/4" Square paper pieces | matching acrylic template

Cutting
For each Churn Dash block you will need to cut the following (approximate sizing, which allows for acrylic cutting templates with 3/8" seam allowance);

From background fabric (Pink)
(2) 4" squares. Subcut diagonally to make (4) triangles.
(5) 2" squares

From coloured fabric (Dark Pink)
(2) 4" squares
(4) 2" squares

As a guide, from a UK sized fat quarter you can make approximately 7 blocks per fat quarter for the main coloured fabric (shown here as dark pink). With a US size fat quarter you can make 6 if you're accurate.

Block Assembly
1. Once you have cut your fabrics, baste your fabrics to the paper templates. I like to use the Sewline Glue Pen, but use your preferred method either glue or tacking. I have a detailed EPP basting tutorial if you needed more information.


2. Following the diagram below, assemble your block by sewing each row together using a whipstitch. I have a detailed tutorial on sewing EPP shapes together for further help on this topic.


3. Sew the three rows together to complete the block, easy peasy!


Fabrics used: Full Circle by Marcus Brothers and Pink Carolina Gingham by Robert Kaufman.

Thanks for sewing along with me! It's good to be back over here. Tag me on instagram @messyjesse1 or @sewandquilt so I can see your Churn Dash blocks.

Liberty Charm Square Quilt

$
0
0


Hello friends! How are you doing? During these tough times for so many of us I think keeping ourselves busy with our favourite hobby of quilting is one of the best things we can do :-) so here I am spreading the quilting cheer!

Robin cut these new 5" Liberty Tana Lawn Charm Squares a few months ago and we've just packaged up in these nice cellophane bags (we originally had them fanned out on cardboard, which took a crazy long time to do as you might imagine! Luckily, it just dawned on me to package them like this, so here they are! Finally back in stock!). Each pack includes (40) different Liberty prints in a rainbow colour selection, so you will have one happy looking quilt with these!

I did the math and drew up a few diagrams below for a quilt using two charm packs, so (80) 5" squares total. Your quilt top will finish approximately 36" wide x 45" long, which makes a nice cot or lap sized quilt.

Quilt Assembly
1. Trim and square up your 5" square's. We cut our charm packs a touch larger, to account for any miss-cuts so you can square up at home.

2. It will be an 8 x 10 block layout, so pull your first (8) squares, you can mix up how you like but I personally tend to gravitate choosing light / dark / light / dark etc. Squint your eyes, or take a photo on your phone and change the setting to black and white, so you can see the different values more clearly. 


3. (Using a 1/4" seam allowance) Sew your first row together. Press your seams in one direction.
4. Continue to make 10 rows total. Press seams to one side, alternating from the row above. This allows for seam nesting when you sew the rows together and creates lovely flat seams on the back of your quilt.

5. Sew the rows together. Join in pairs and then continue to add bigger sections until you have one quilt top piece.

6. Give the quilt top a good press, pressing seams open and flat as you go.

7. Finish your quilt in the usual fashion. You will need 1/2 yard of fabric for binding (with some leftover). Cut (5) 2" width of fabric strips, sew together in one continuous binding strip, sew to your quilt top and fold under to the backside of the quilt and hand sew in place with a blind-stitch.

Happy sewing folks, lots of love to you all.
Viewing all 205 articles
Browse latest View live